

Send email from Shopify Flow with a custom SMTP server
Overview
Workflow Transactional Email lets you send transactional email from Shopify Flow through your own SMTP server. In this example a customer receives a VIP tag, Shopify Flow runs, and the workflow sends a branded email using your saved SMTP server and email layout.
This setup has three parts:
- Create an SMTP connection under Email Senders
- Design the email under Email Layouts
- Use the Send Transactional Email action in Shopify Flow and pass customer data into the layout
Any provider that speaks SMTP works, including Gmail, SendGrid, Mailgun, Amazon SES and your own mail server.
Video guide
The full setup - SMTP server, email layout, and the Shopify Flow workflow. The video has no sound, so adjust the playback speed to suit you.
Before you begin
- Install Workflow Transactional Email in your Shopify store.
- Have the host, port, username and password from your SMTP provider to hand.
- Decide which sender address the VIP emails should come from.
Scenario: a VIP welcome email
The workflow does this:
- A customer is tagged
VIP - Shopify Flow starts the workflow
- The workflow runs the Send Transactional Email action
- The action uses your saved SMTP server
- The action sends your saved email layout with the customer's details filled in
Step 1: Configure your SMTP server
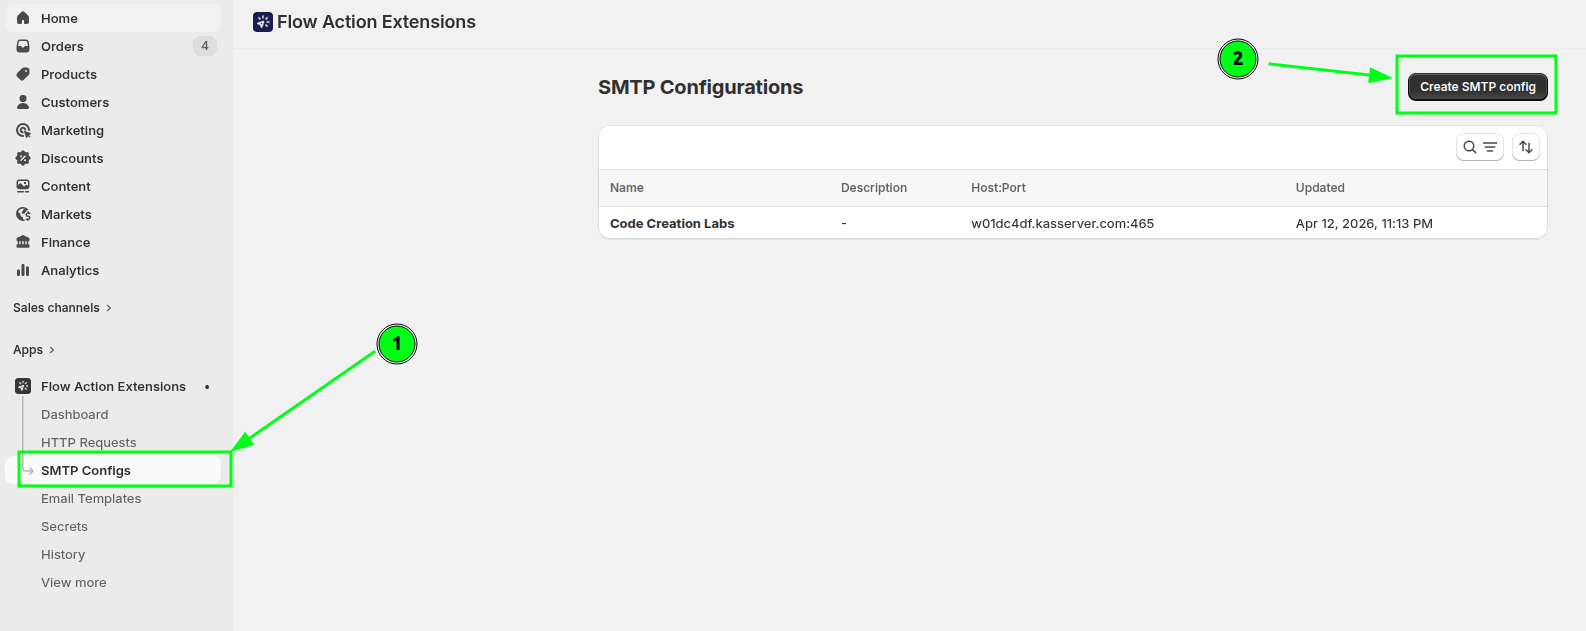
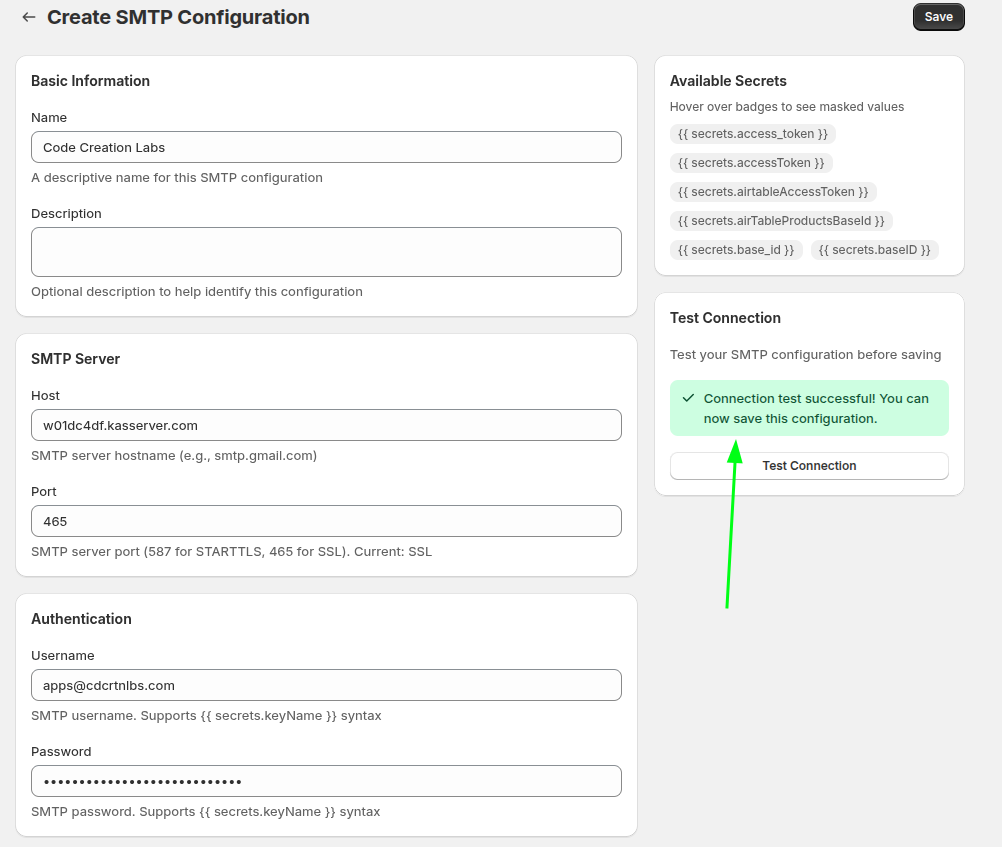
In the app, open Email Senders and go to the SMTP section. This is where you store the mail server that will send your transactional email.
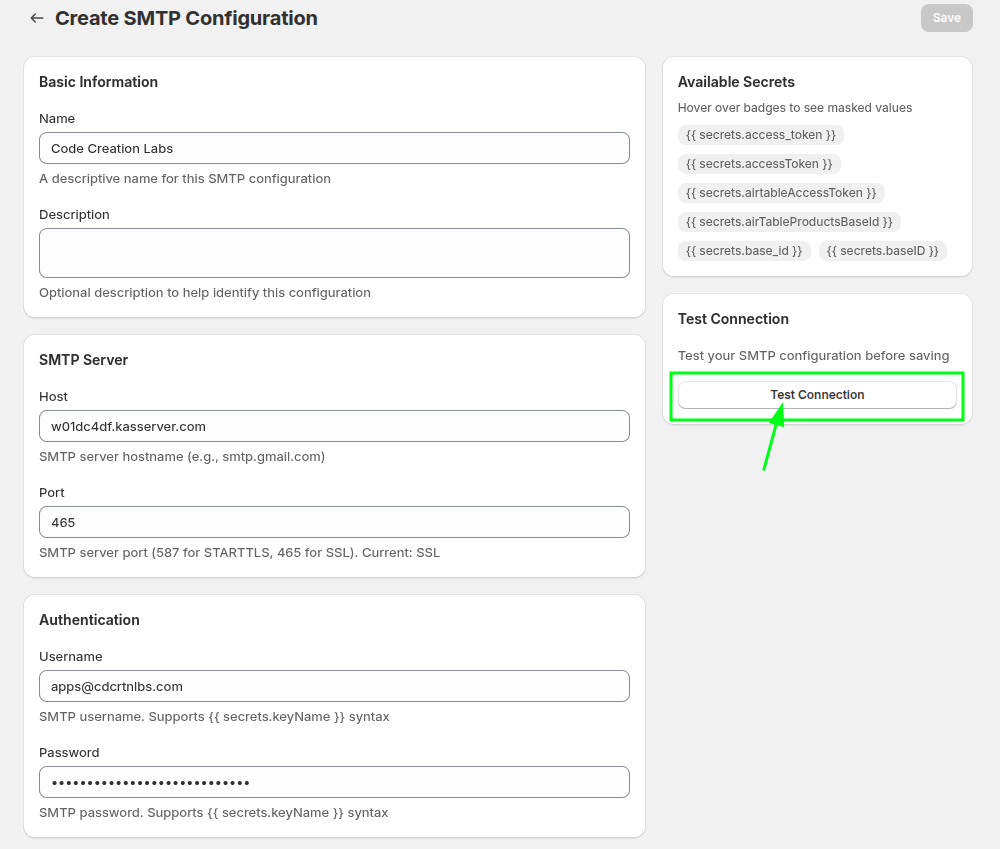
Enter the SMTP host, port, username and password from your provider, then press Test Connection.
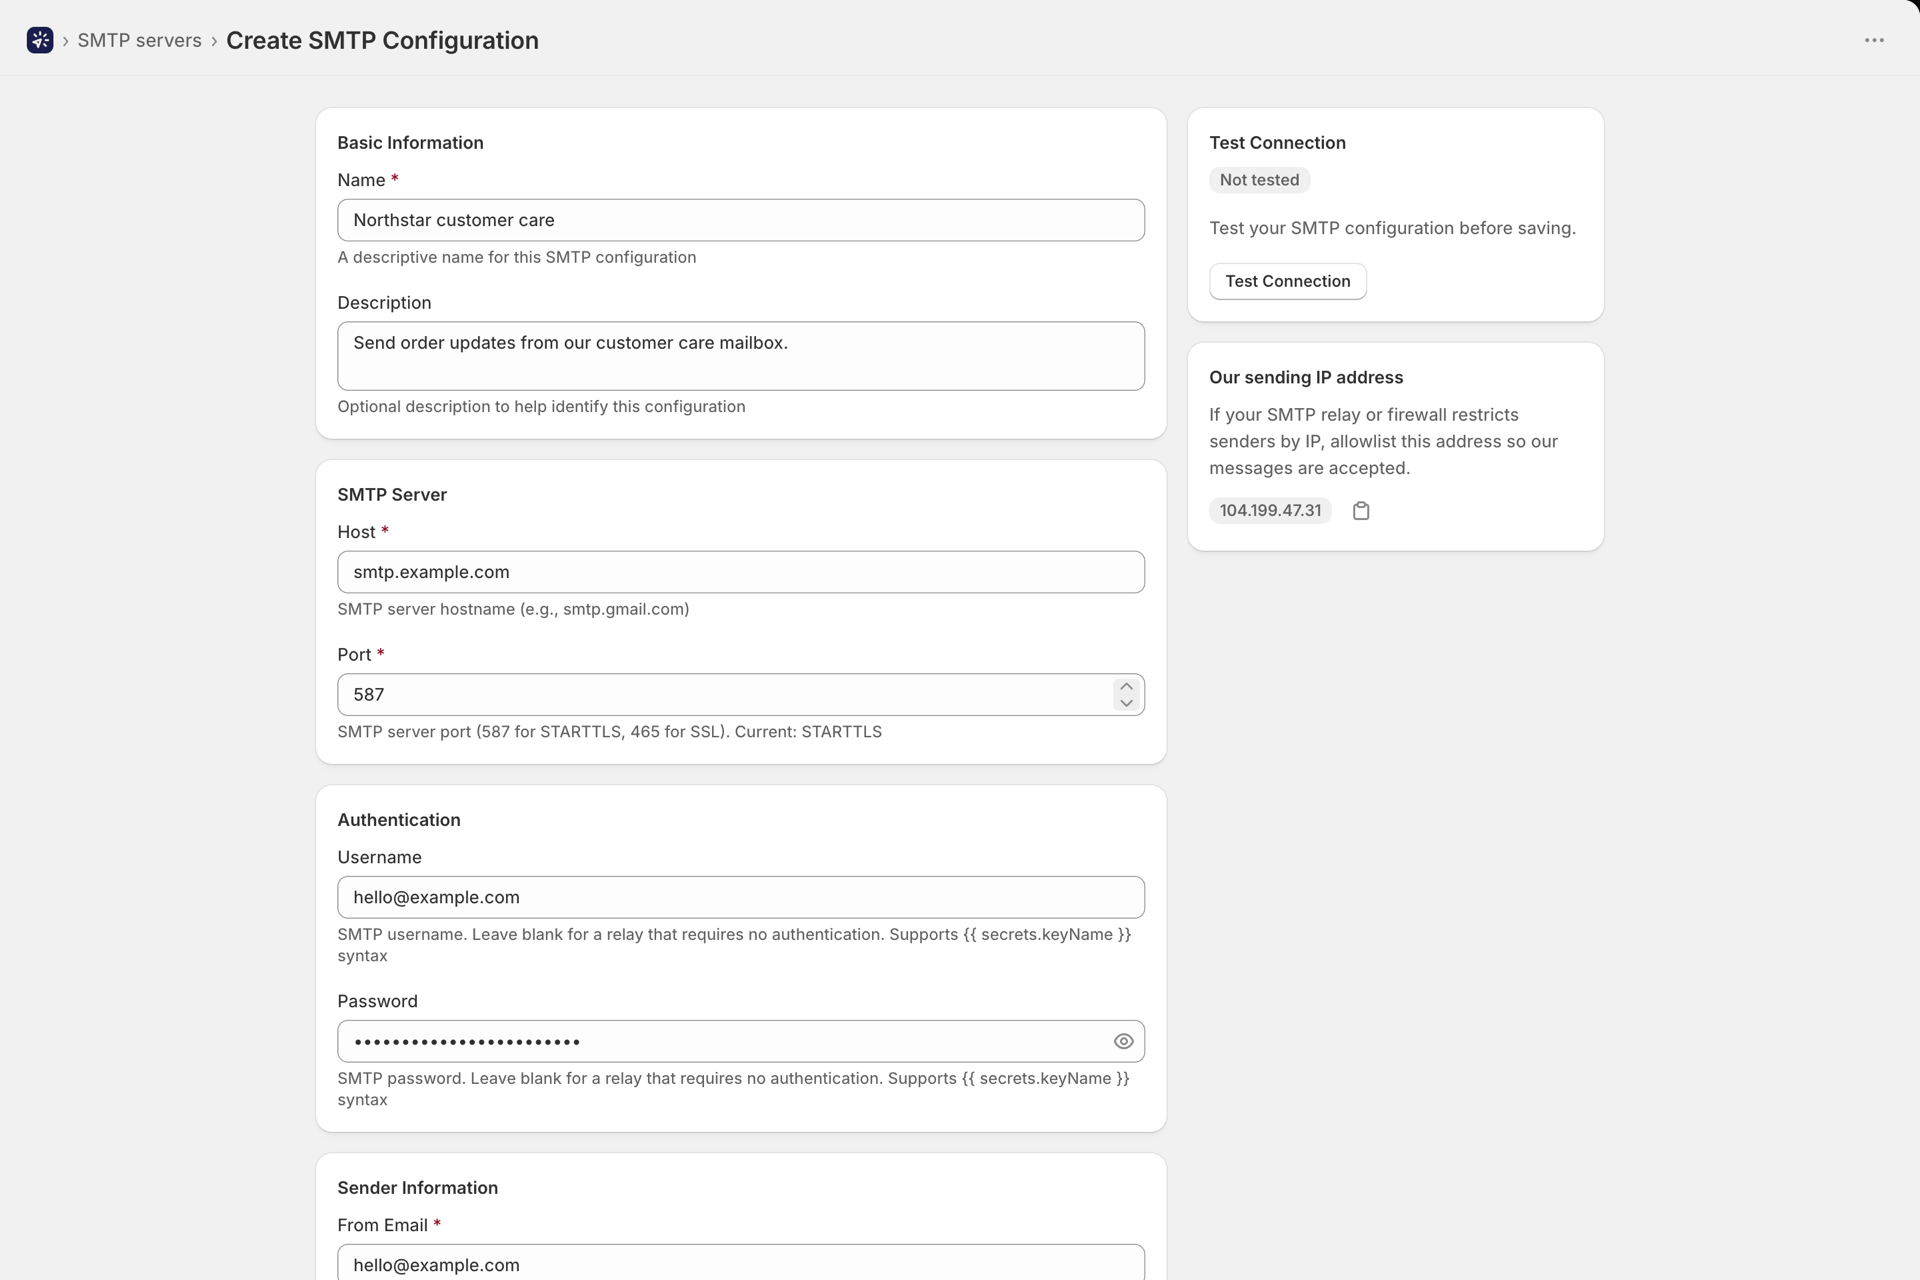
If the credentials are good, you will see a success message.
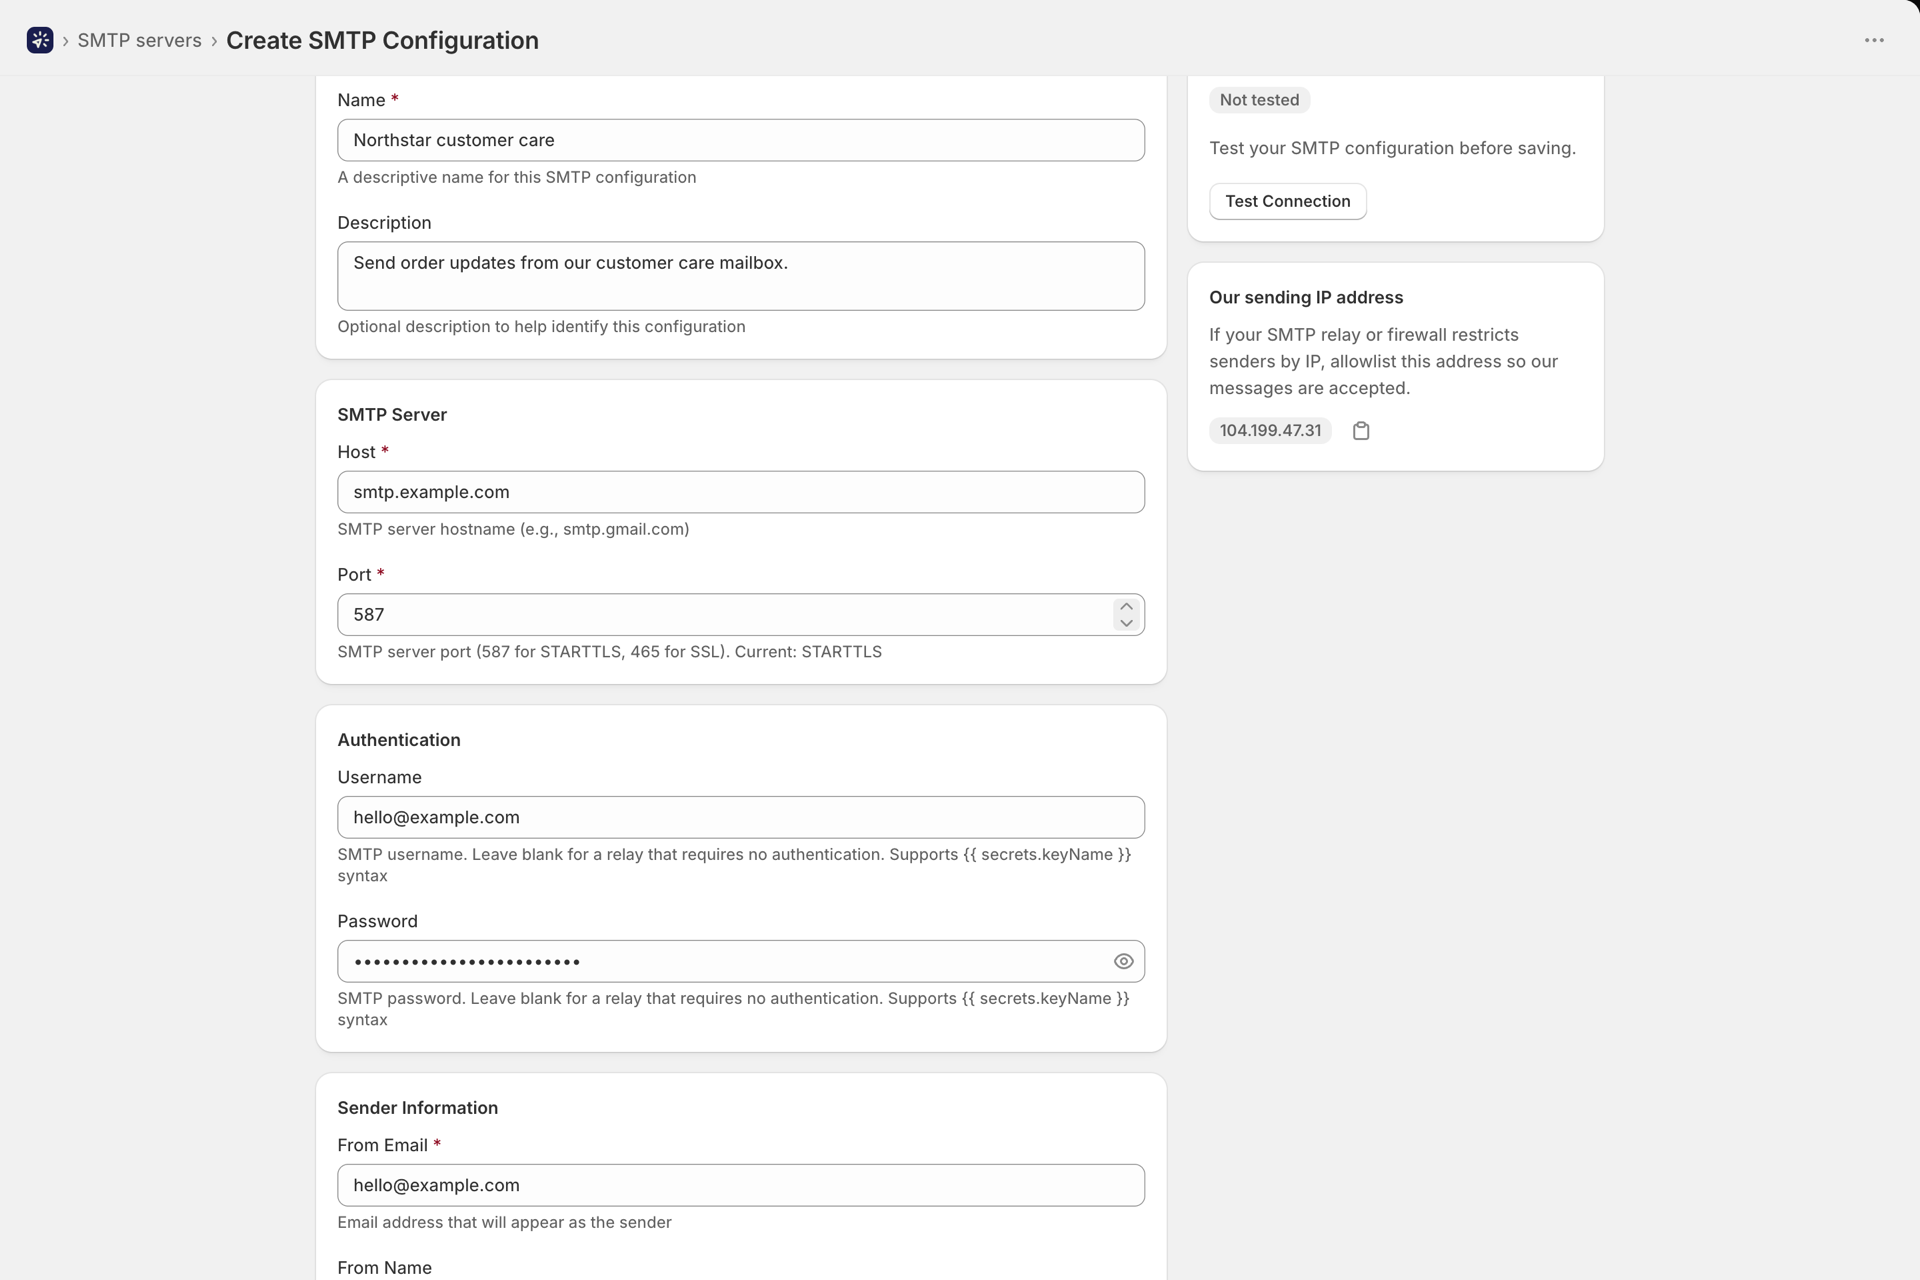
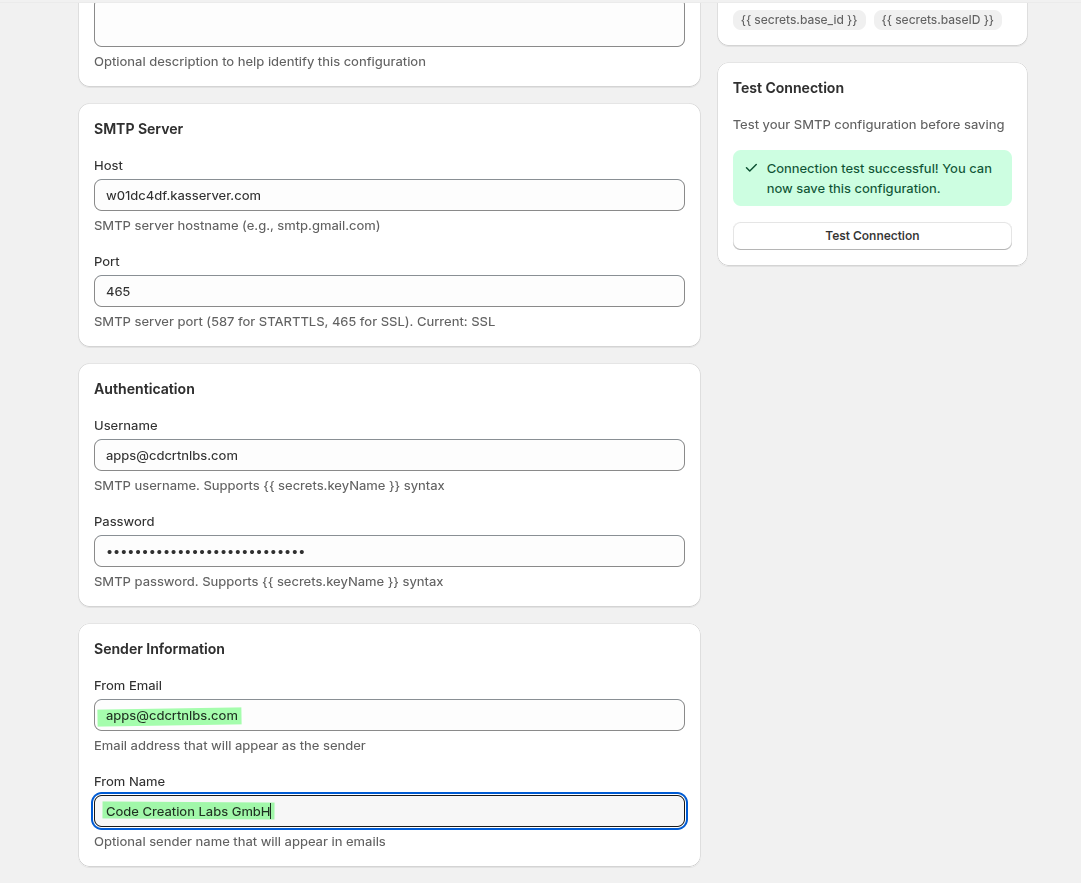
Choose the address the message should come from. Set a display name too, so recipients see your store name rather than a raw address.
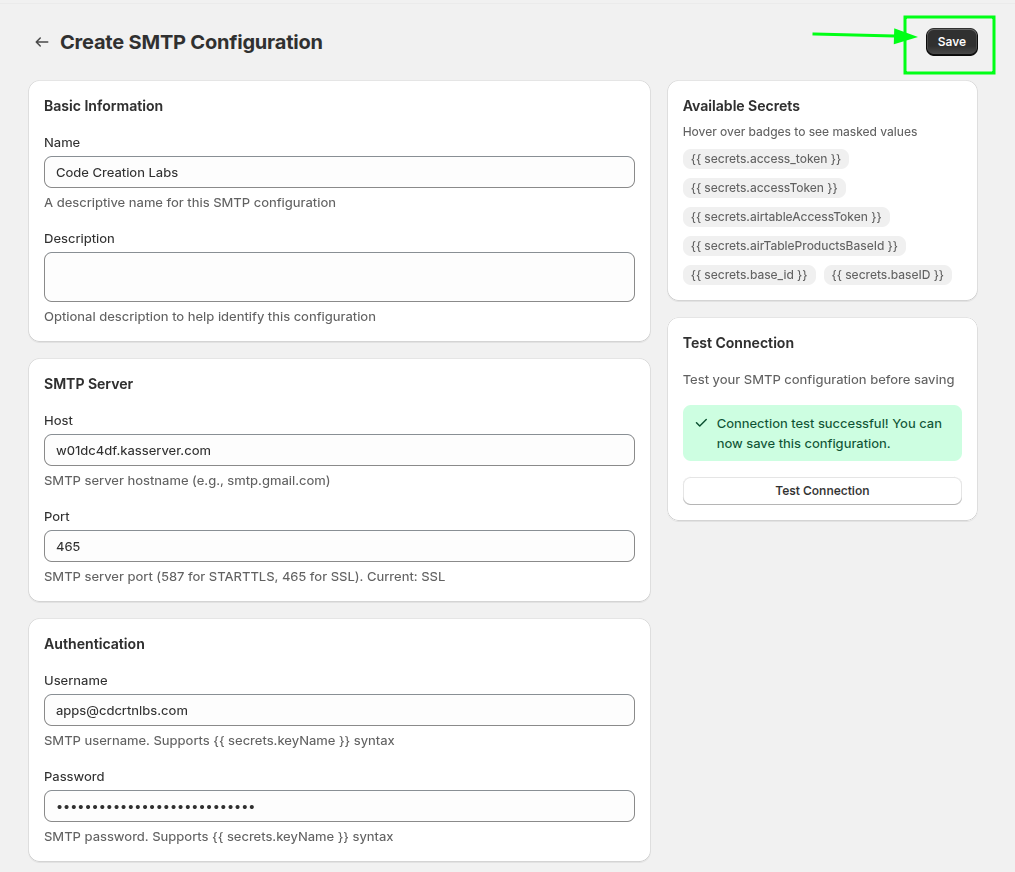
Save the configuration so it can be selected later by your Shopify Flow action.
Step 2: Design the email
Go to Email Layouts. This is where you create the email content that Shopify Flow will send.
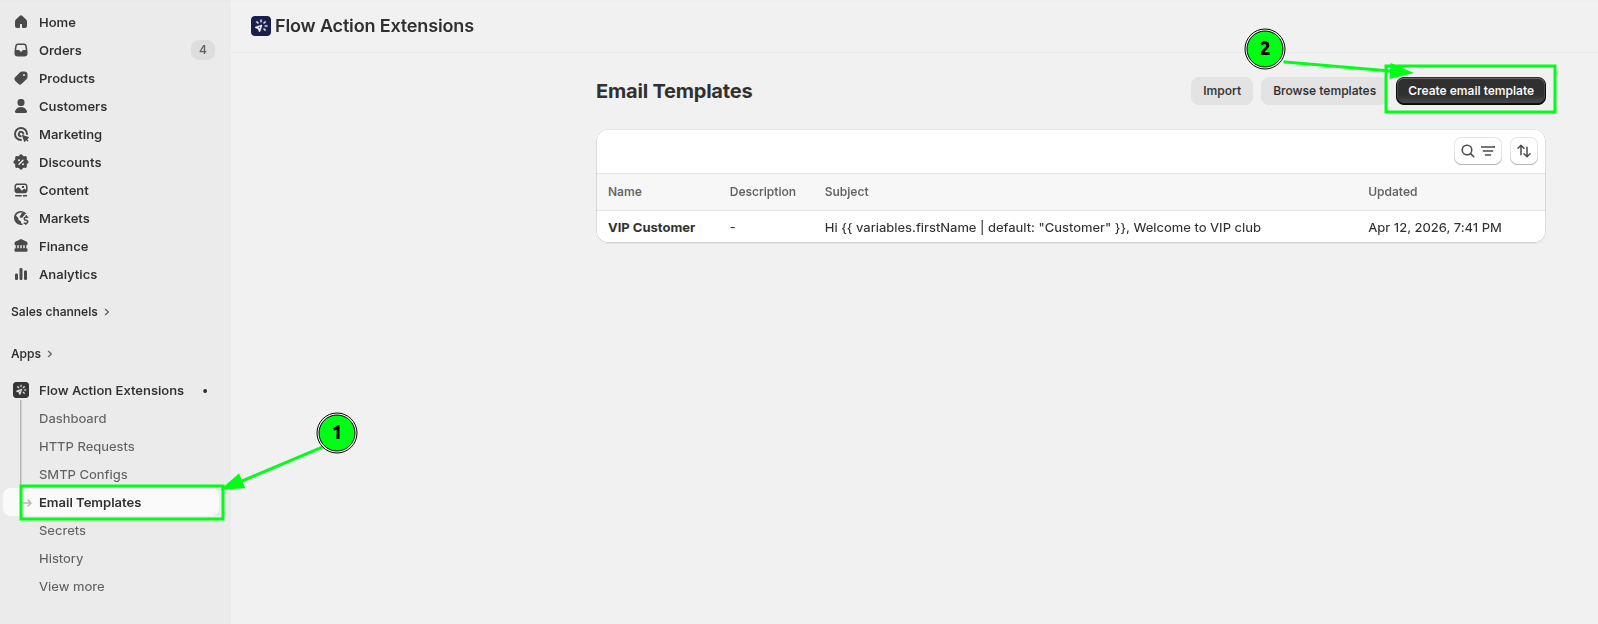
Create a layout for your VIP scenario, with a subject line and a body. The subject can use variables passed in from Shopify Flow. This example uses firstName with Liquid's default filter as a fallback:
Hi {{ variables.firstName | default: "Customer" }} Welcome to VIP ClubAdd blocks to build a design that fits your brand.
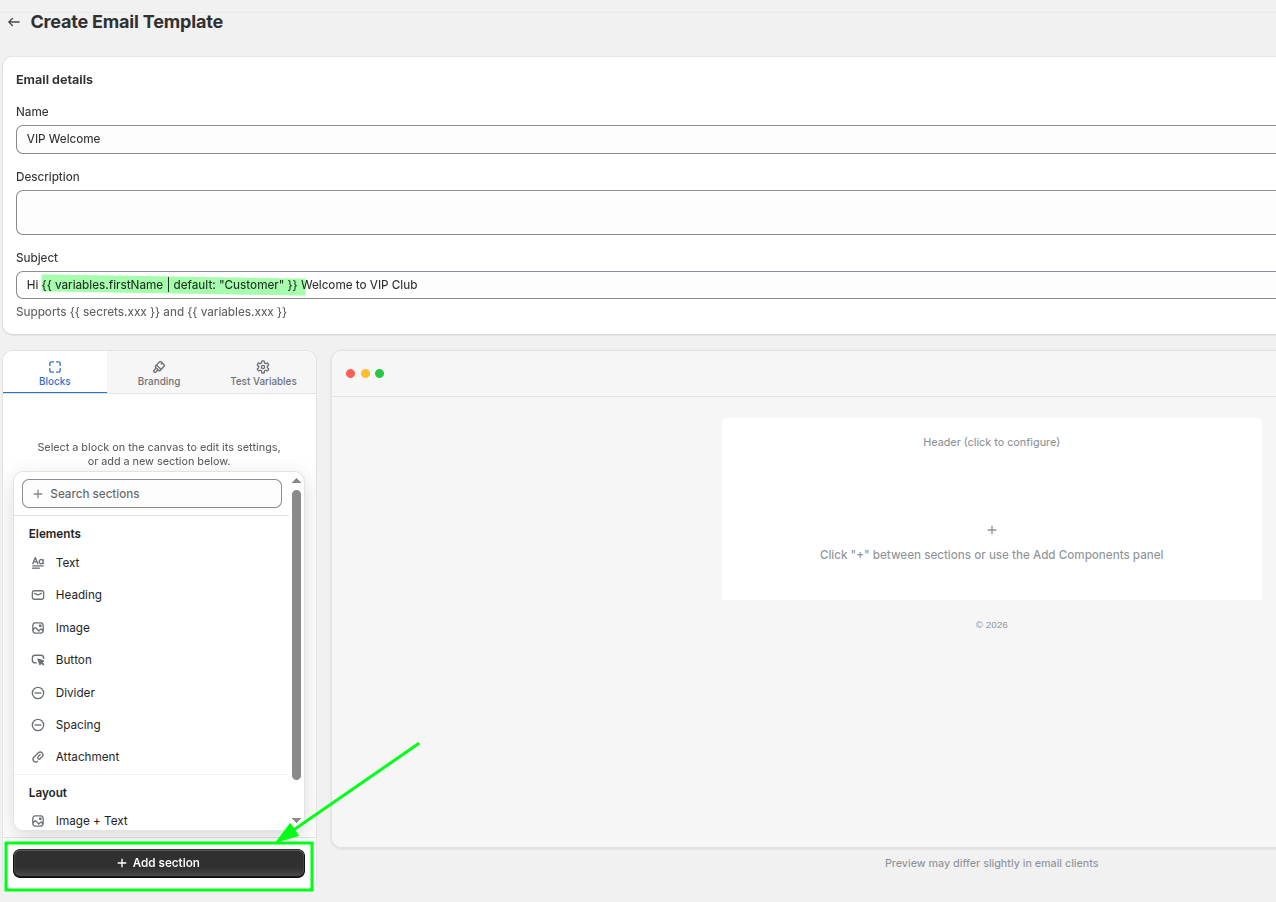
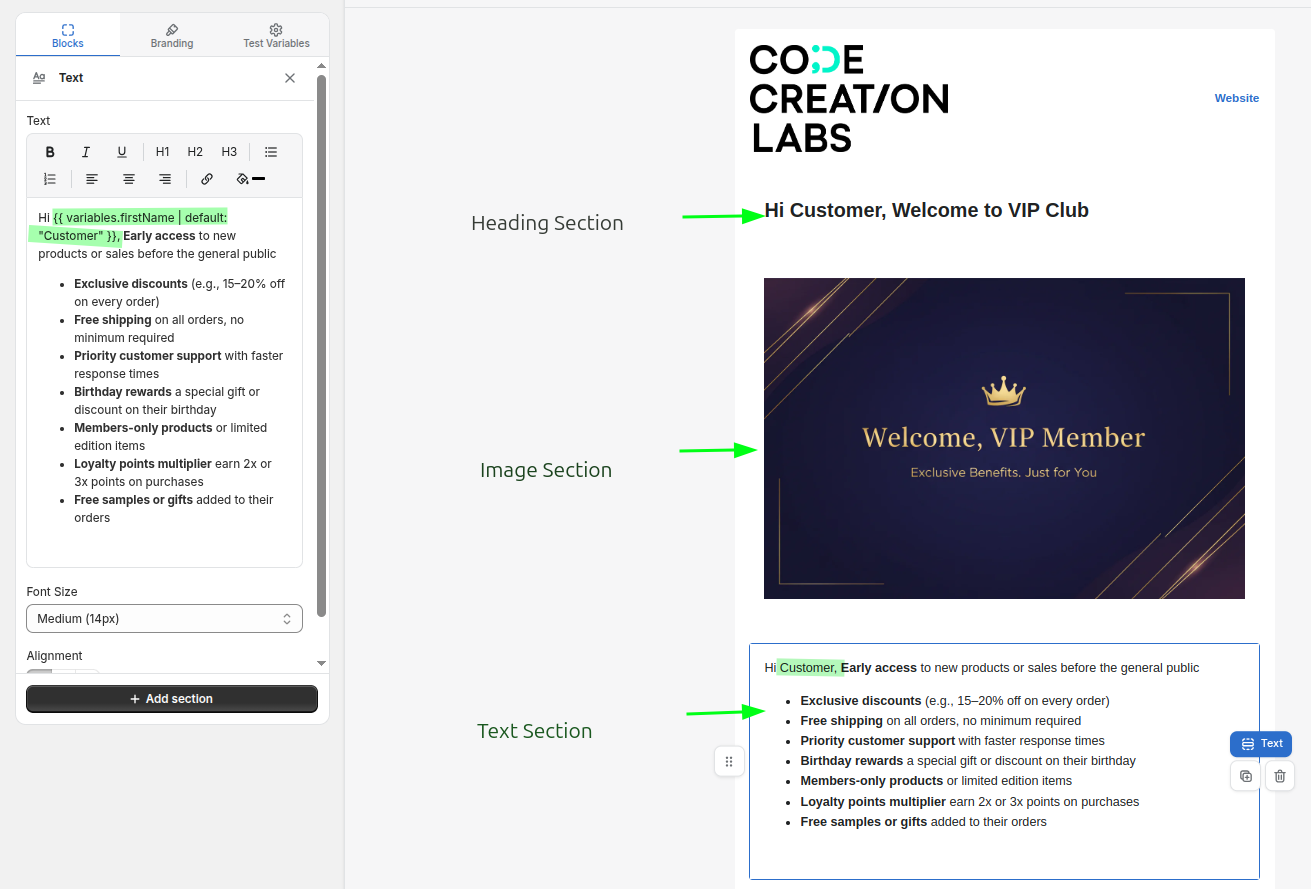
This example uses a heading block, an image block and a text block. The text block references the firstName variable, which Shopify Flow will supply.
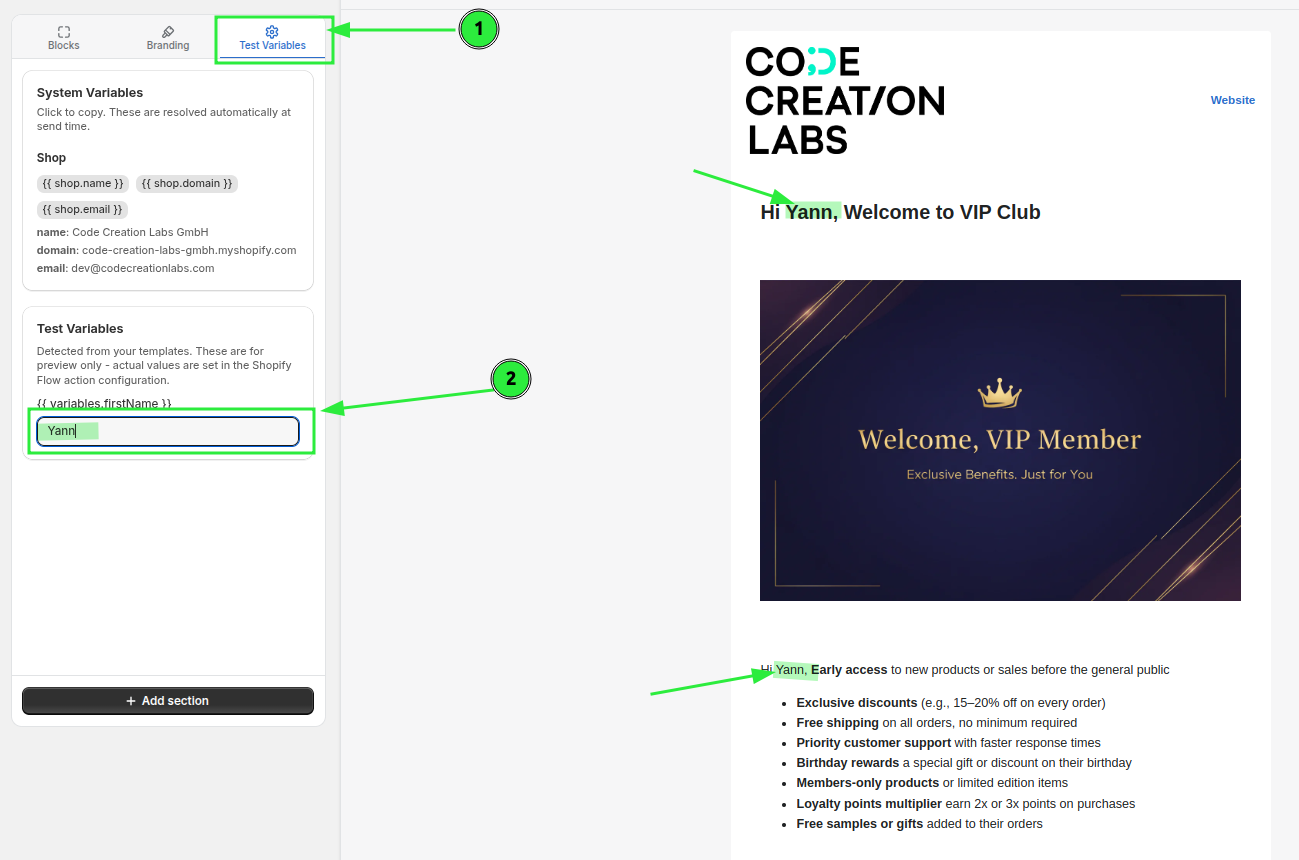
Use the Test Variables section to feed sample values in and check the design renders the way you expect.
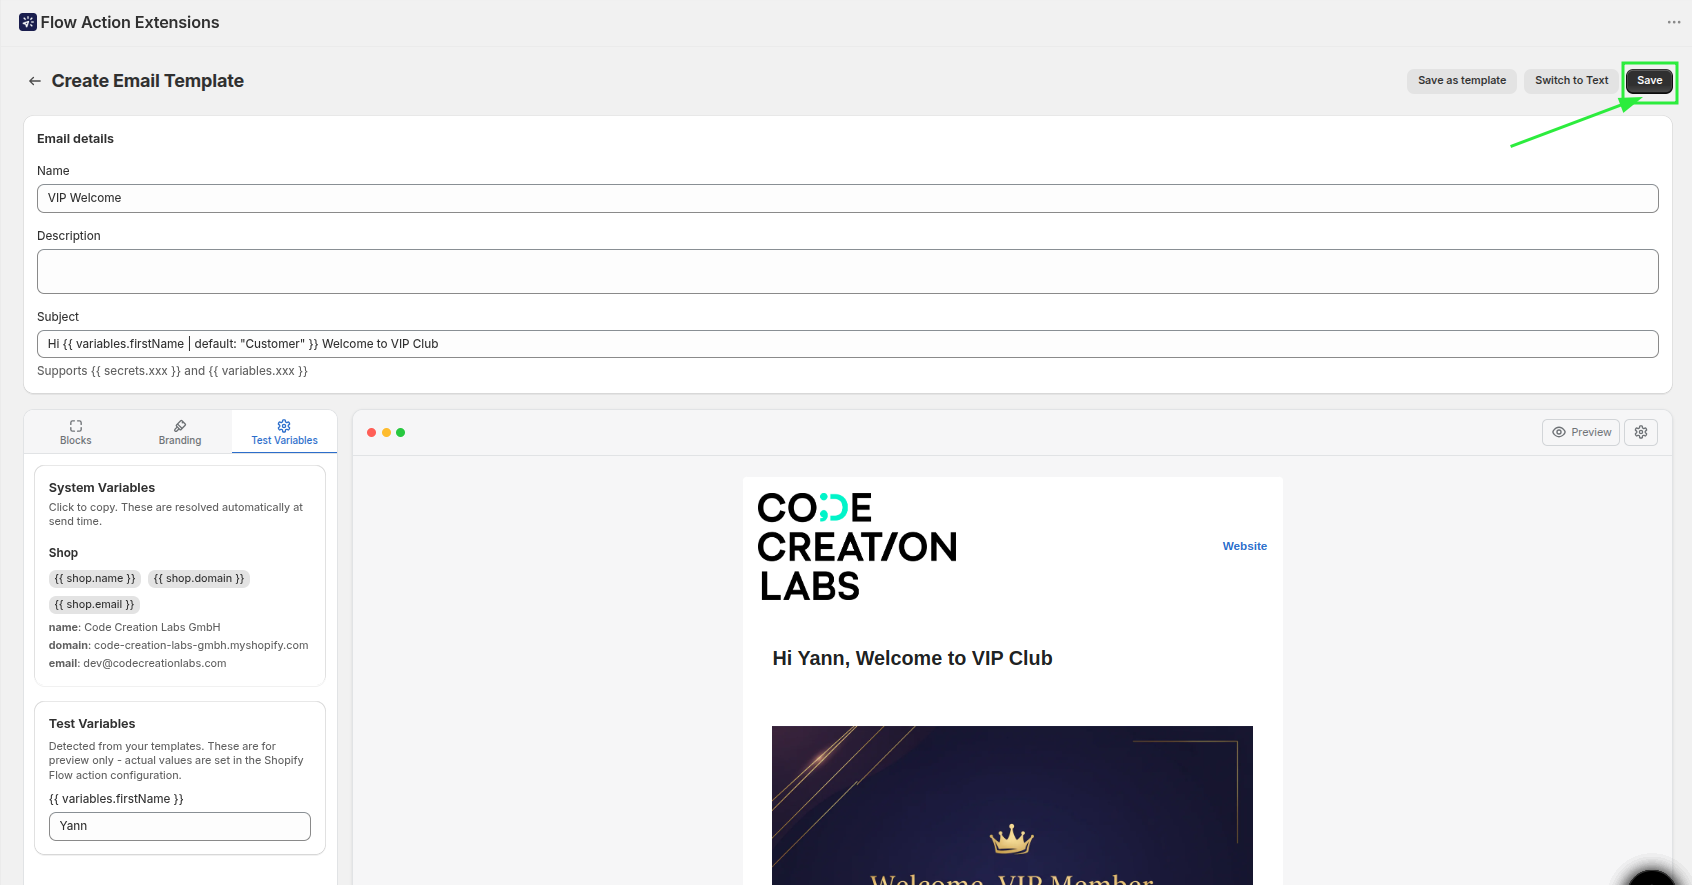
Save the layout so it can be selected inside the Shopify Flow action.
For the full block reference, see Build an email layout.
Step 3: Build the workflow in Shopify Flow
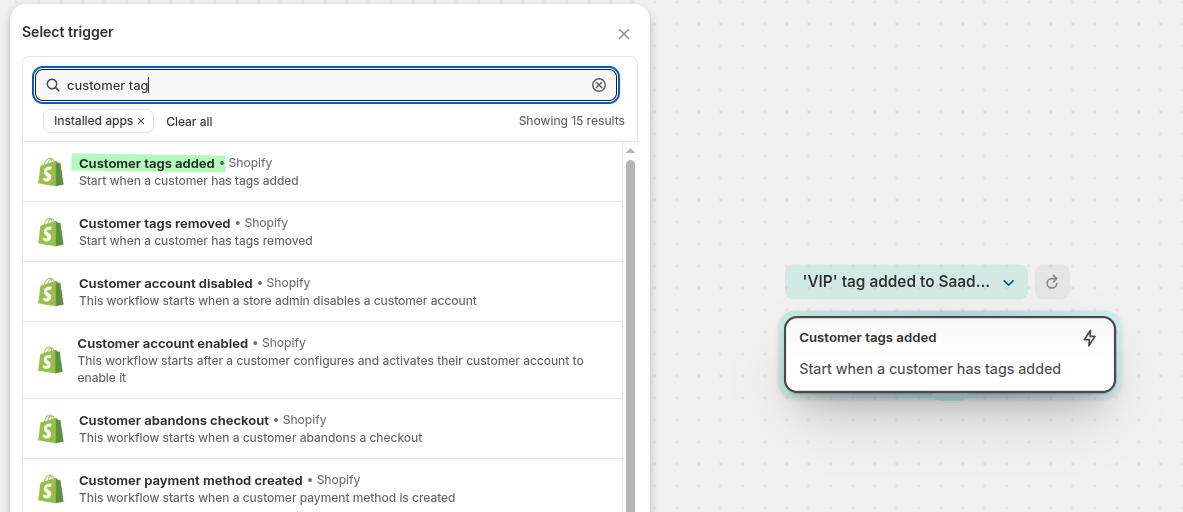
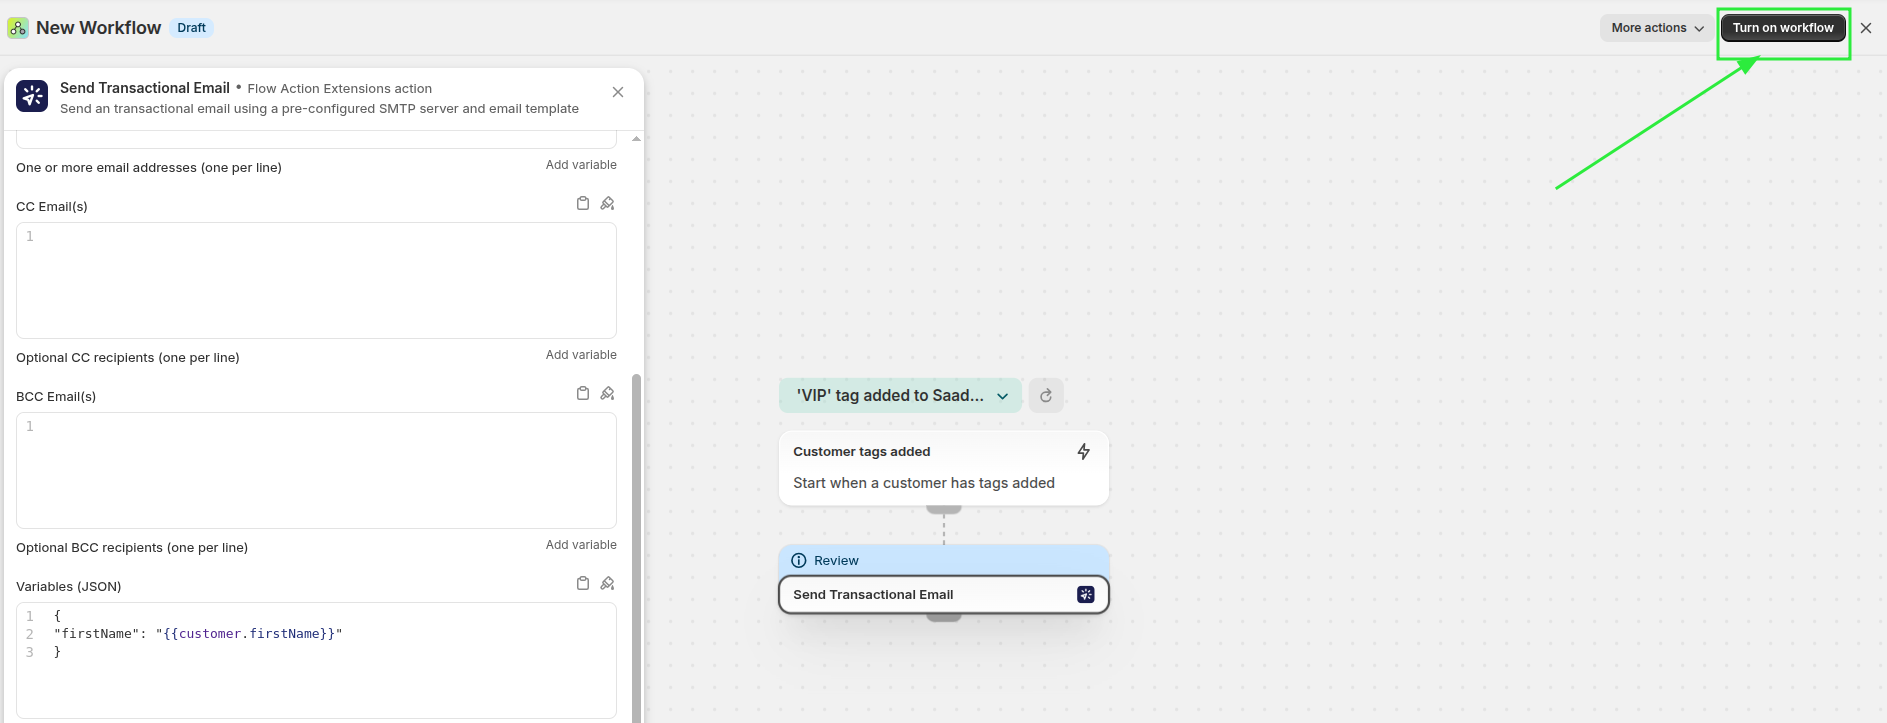
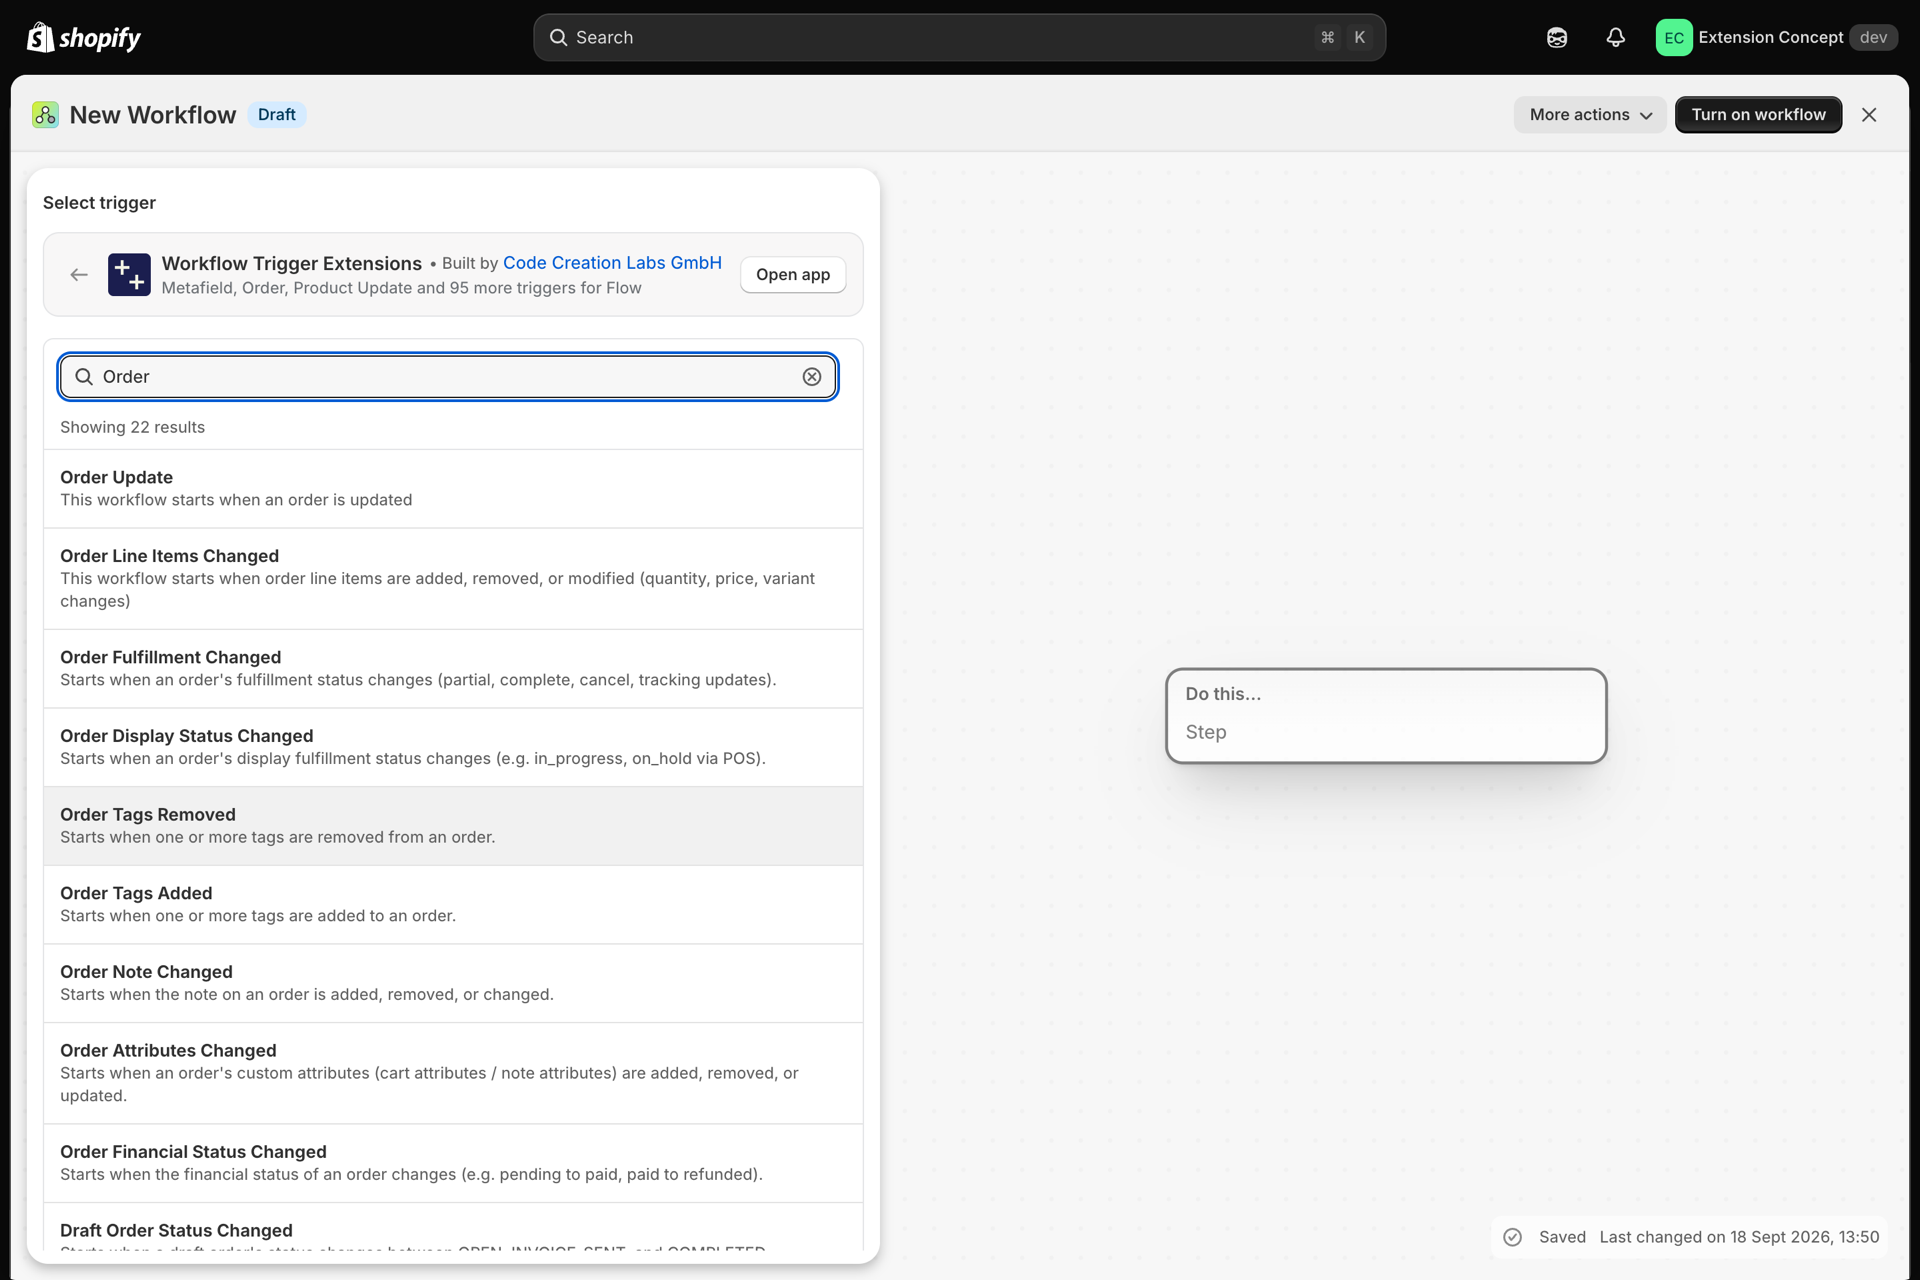
Open Shopify Flow and create a workflow for your VIP process. Use the customer tagging trigger, so the workflow runs when a customer gets the VIP tag.
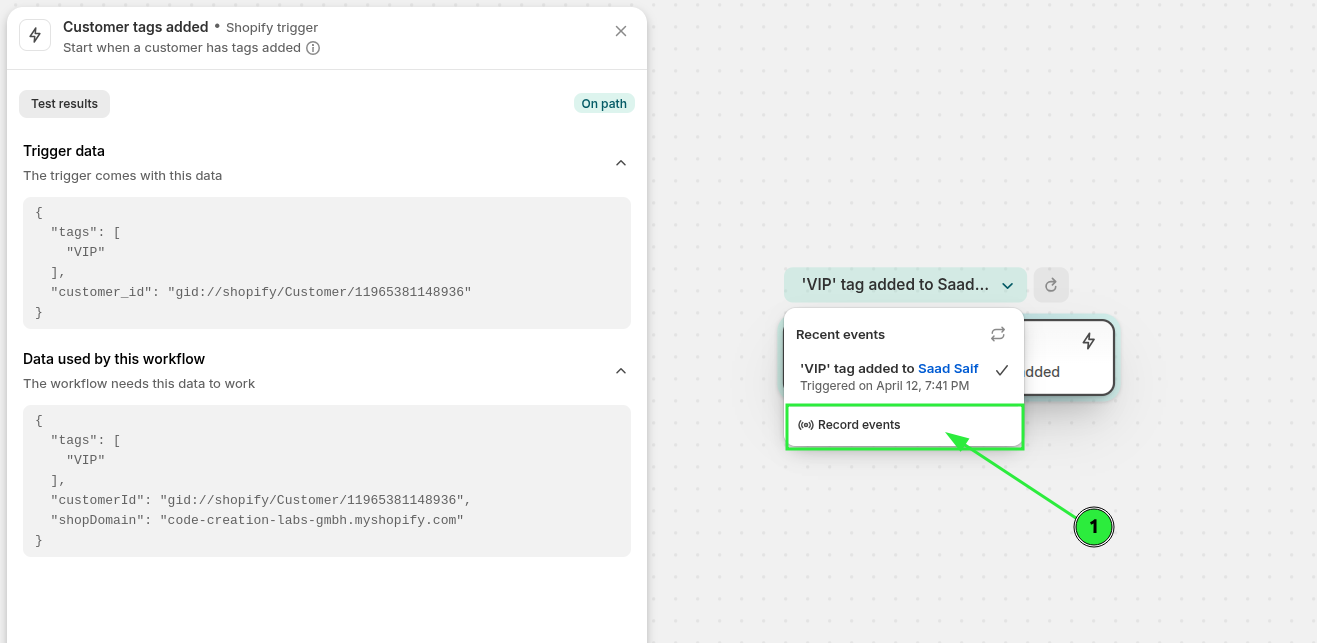
Press Record events, then in a new tab add the tag to a customer. Select the trigger on the left and you will see the real trigger data - this makes picking the right variables much easier.
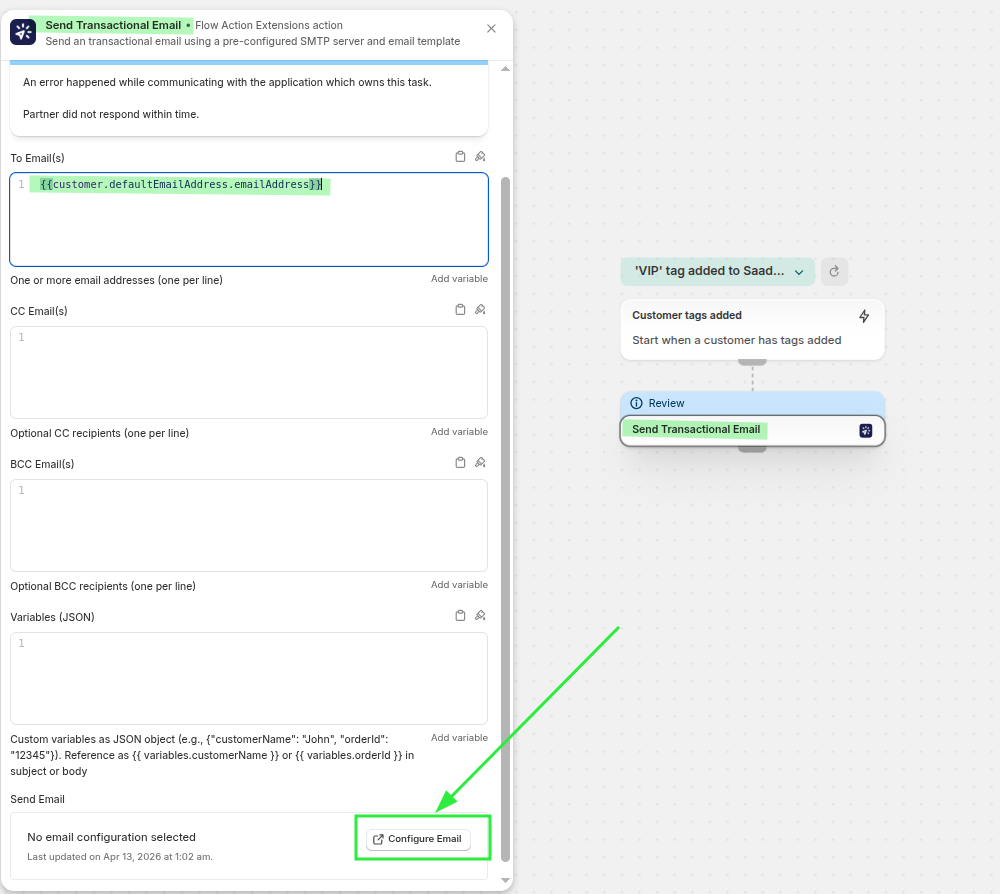
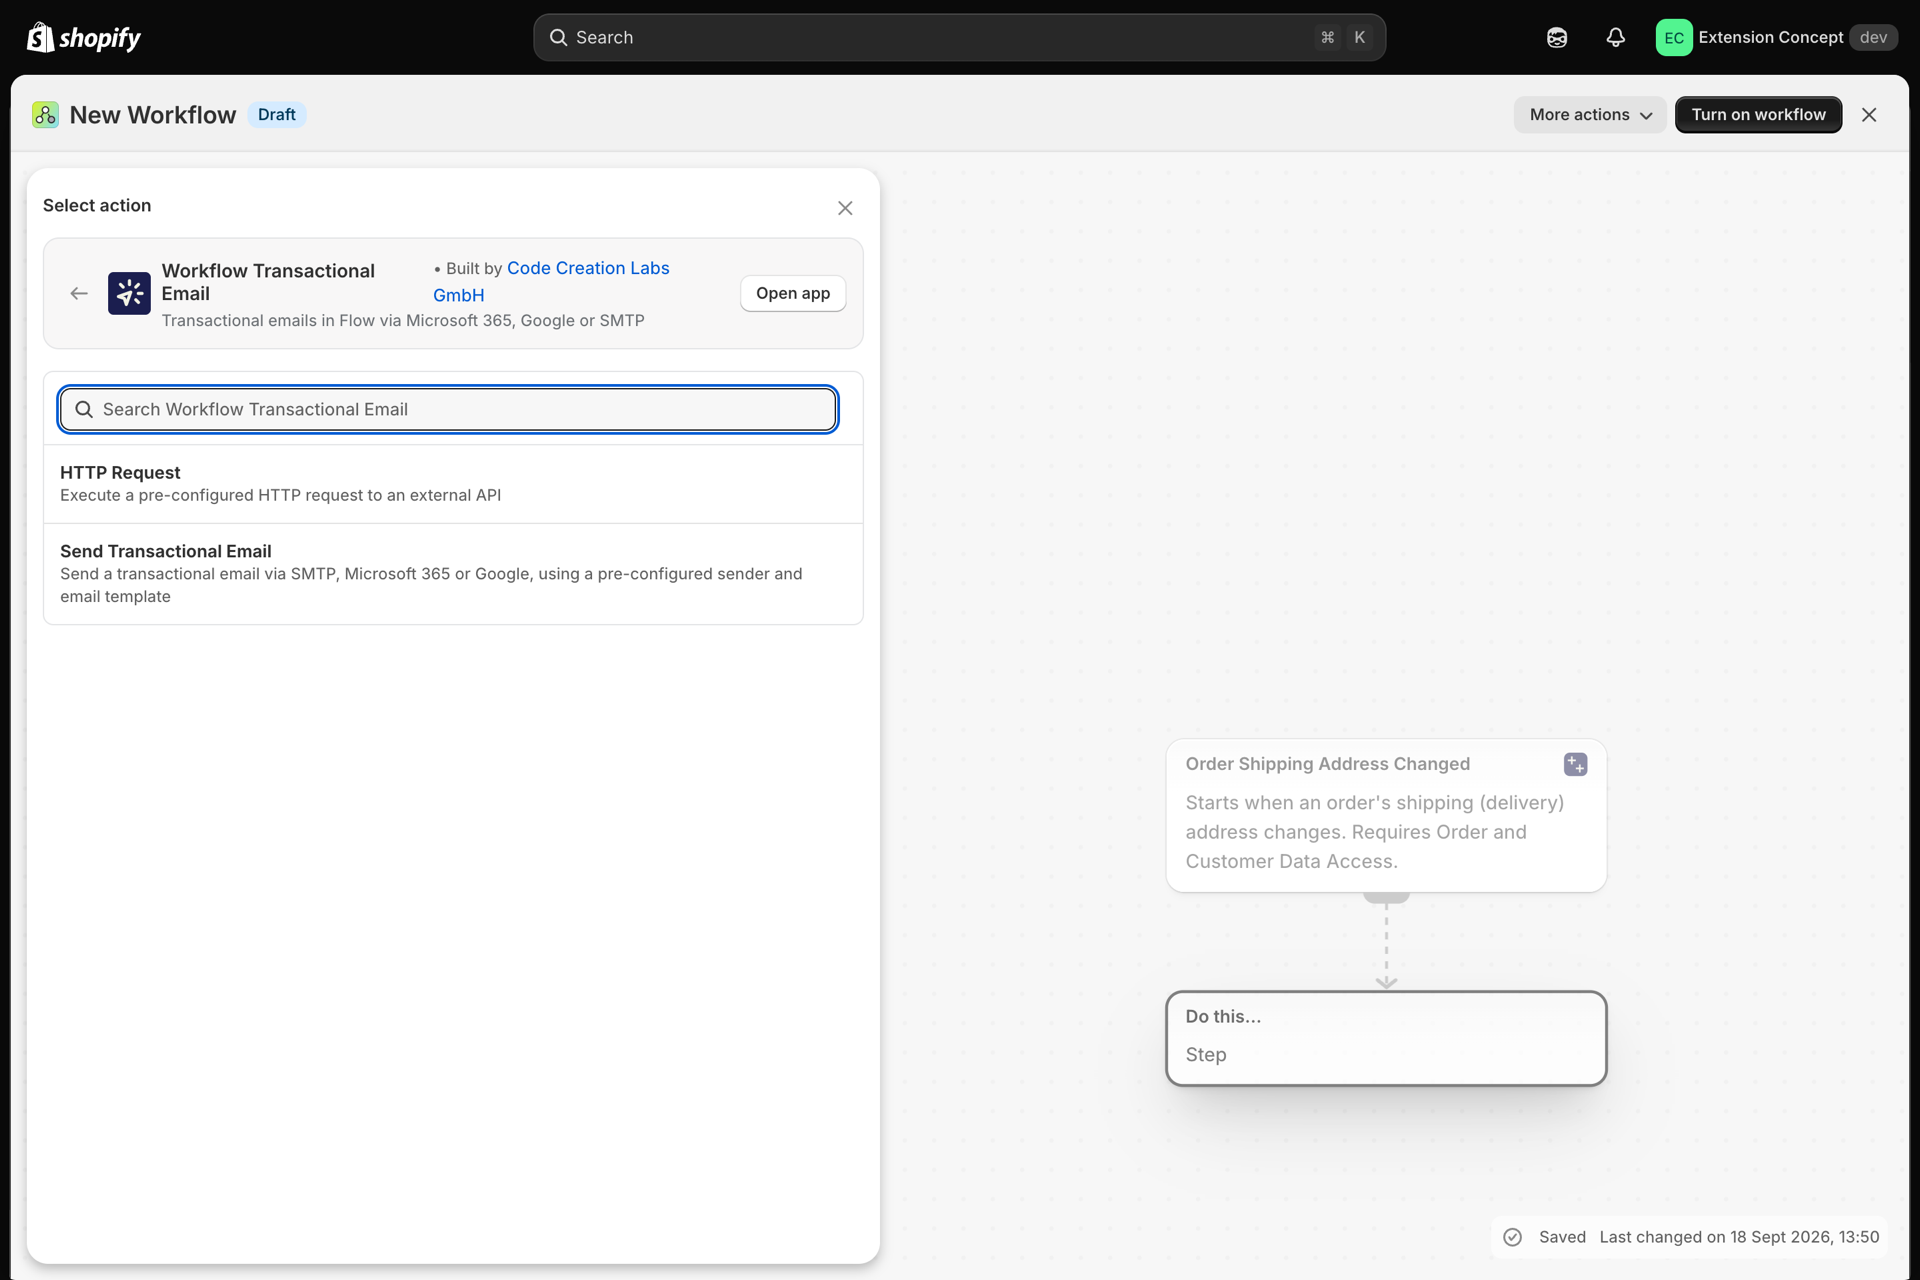
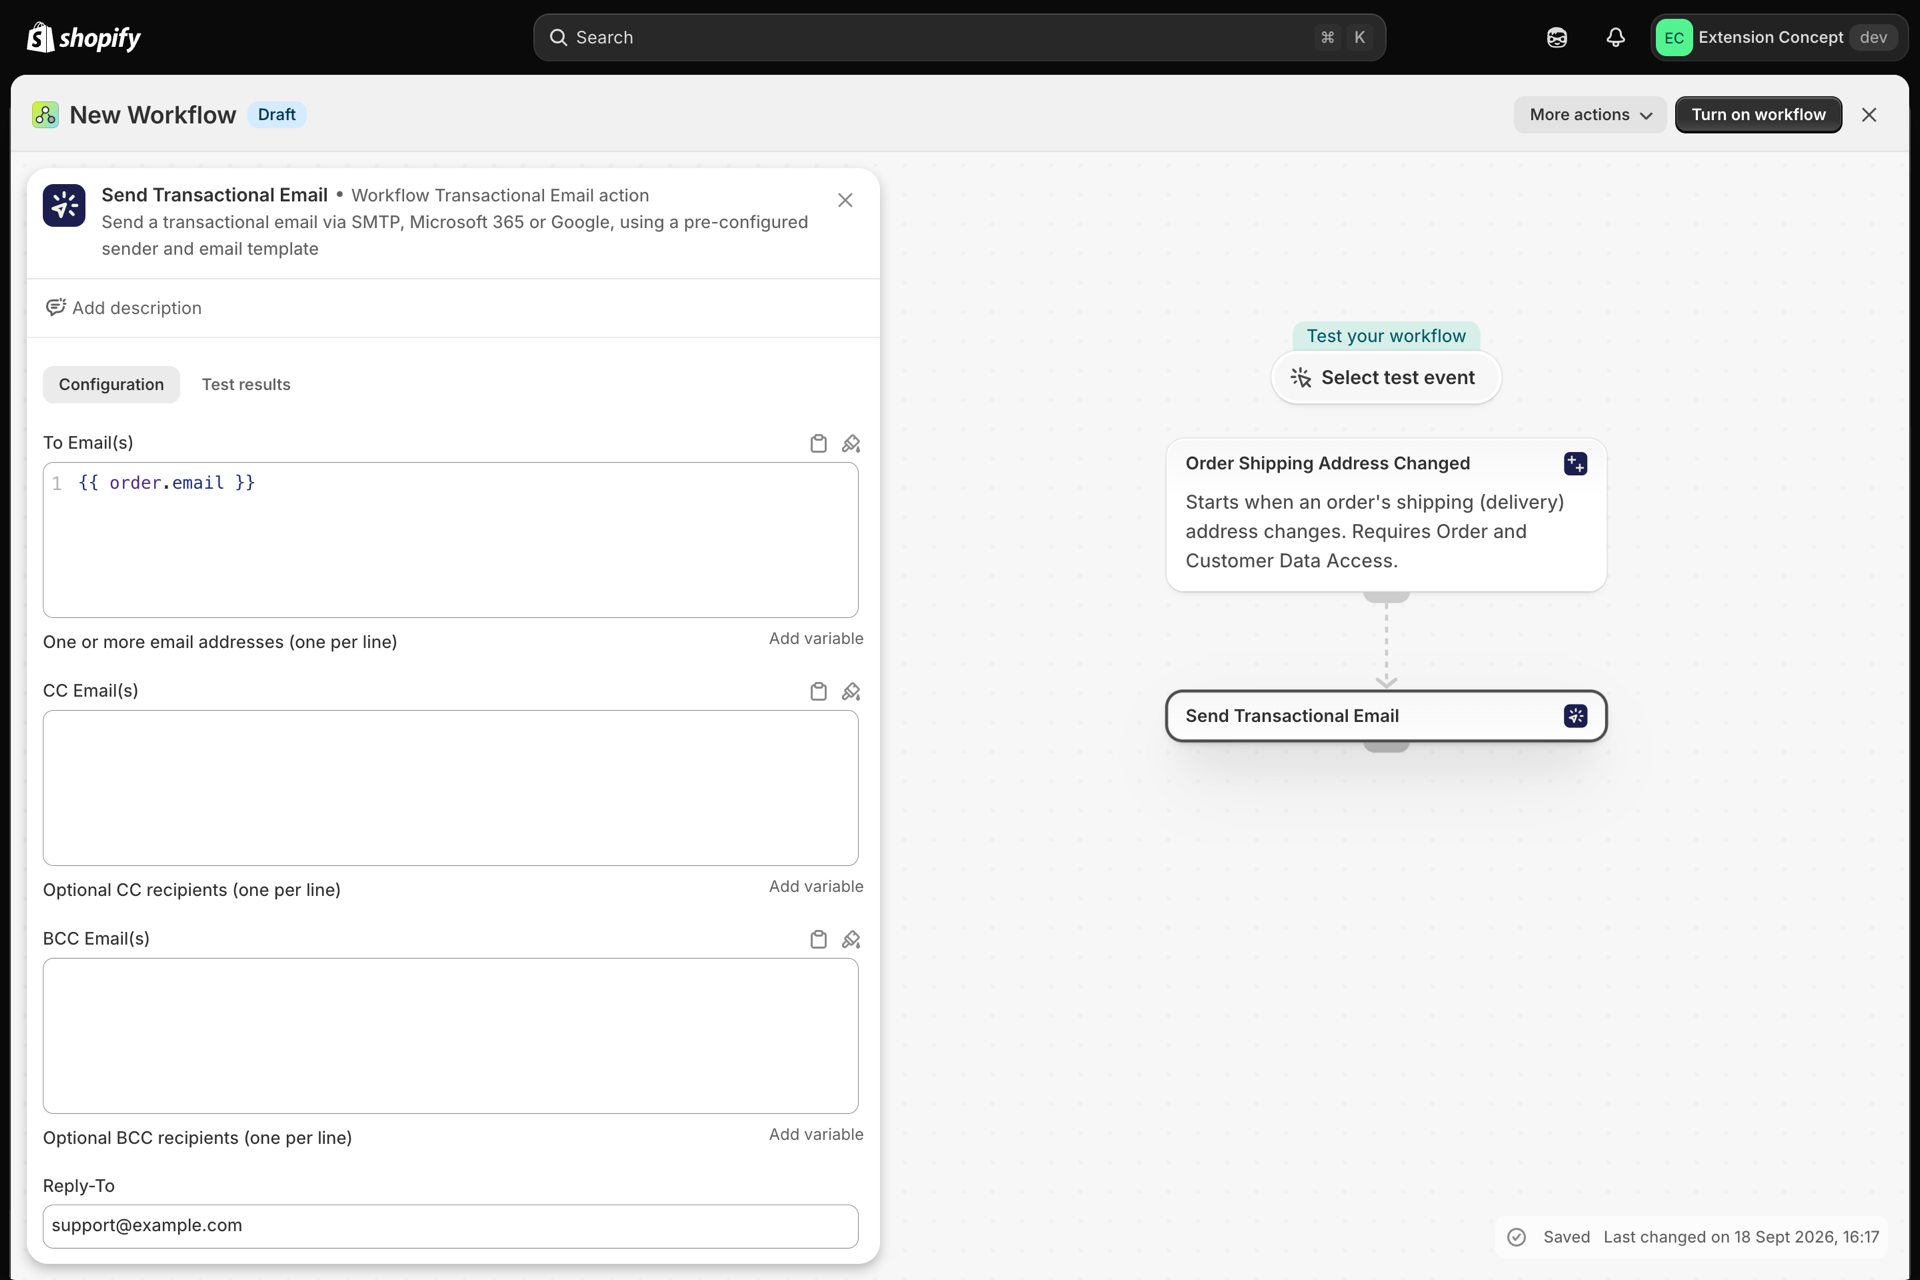
Add the Send Transactional Email action. In To Email(s), use the customer's email variable. Then press Configure email.
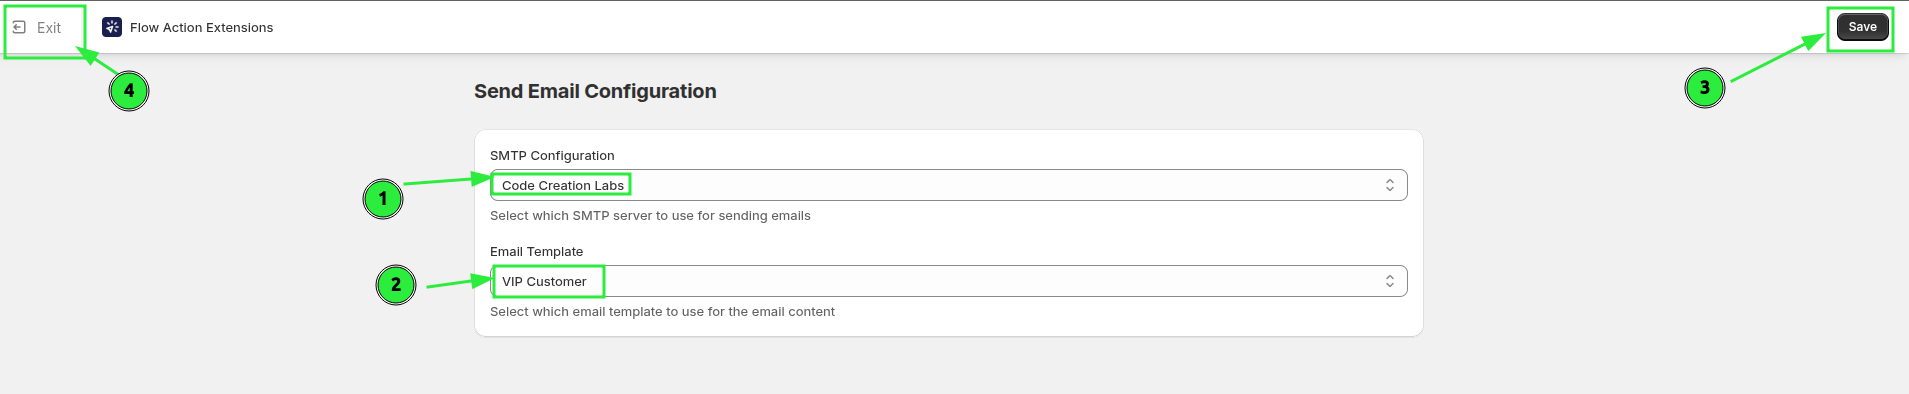
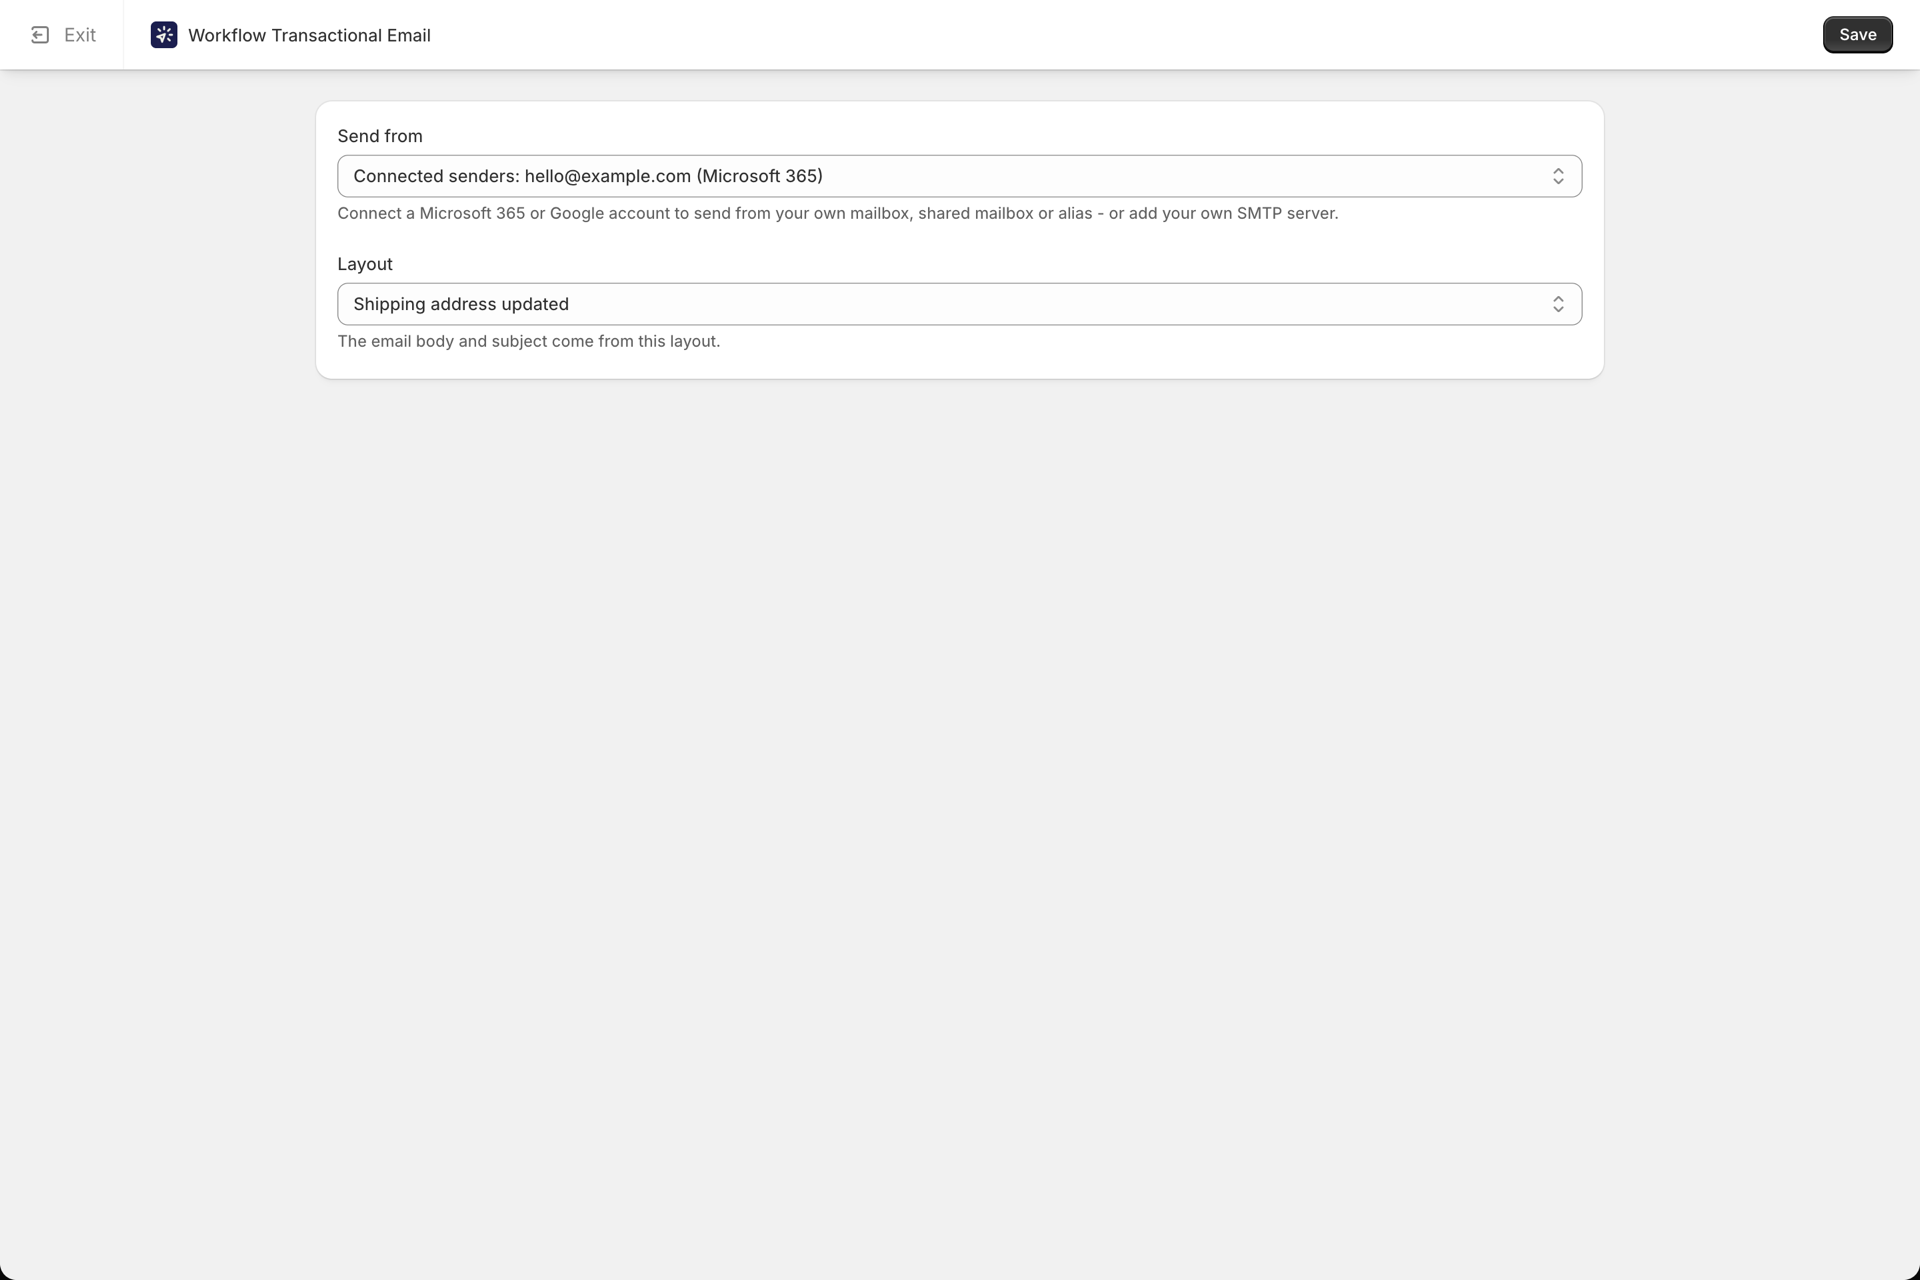
In the configuration screen, choose the email layout you created and the SMTP server this email should go through. Press Save, then Exit to return to the workflow.
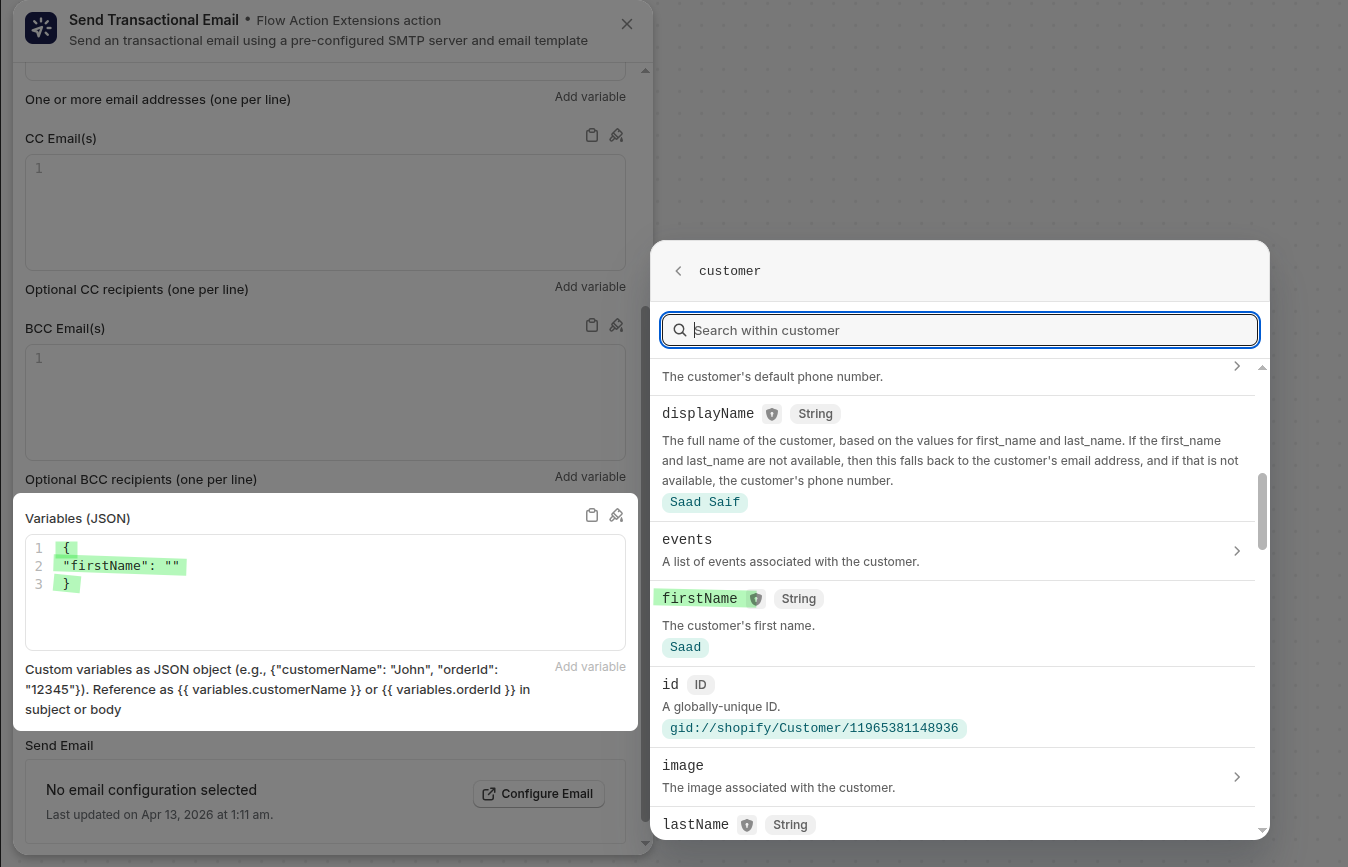
Back in the action, pass the data your layout needs in the Variables (JSON) field:
{
  "firstName": "{{ customer.firstName }}"
}
Turn the workflow on once you have confirmed the trigger, condition, layout and variables are all correct.
How the pieces fit together
When the customer gets the VIP tag, Shopify Flow runs the workflow and calls the email action. That action combines:
- your saved server settings from Email Senders
- your saved design from Email Layouts
- the customer values passed in from the Flow step as JSON variables
Keeping these separate is what makes the layout reusable - you send the same design to every customer without editing HTML each time.
Test it end to end
- Apply the
VIPtag to a test customer - Confirm the workflow runs in Shopify Flow
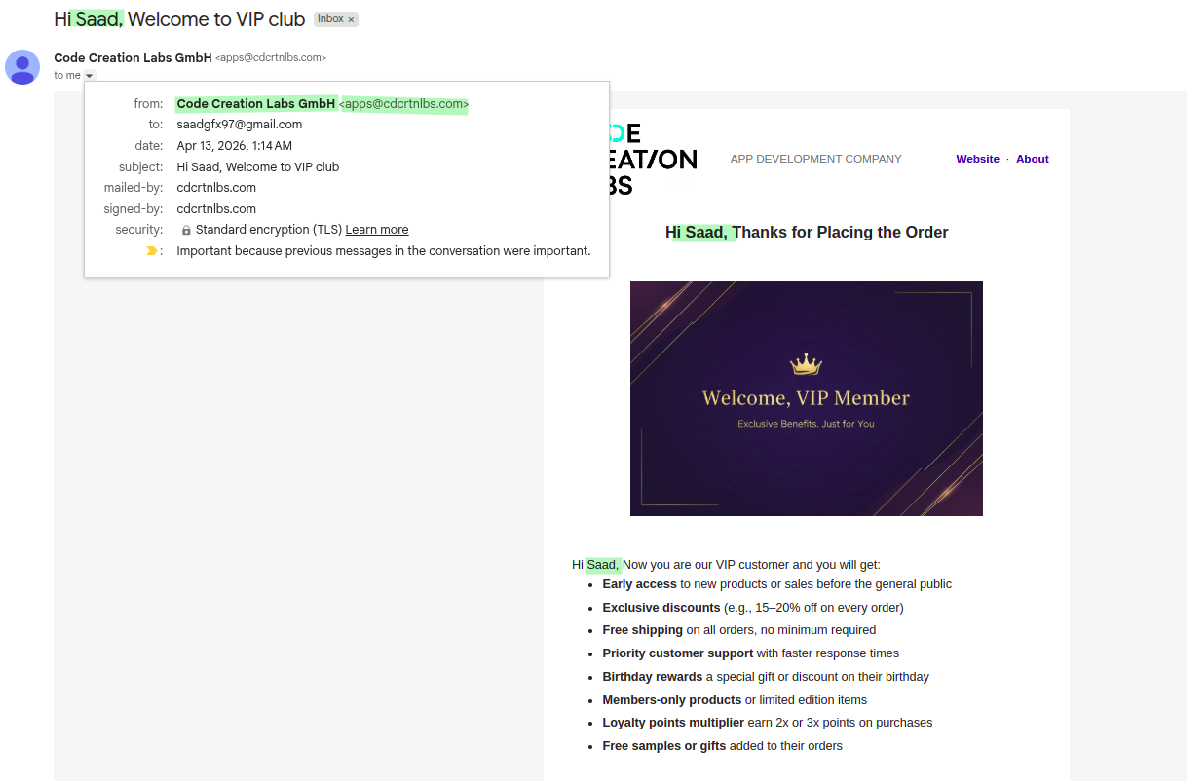
- Check that the customer receives the email
- Verify the subject line and the HTML render correctly
- Make sure the sender name and address match your brand
If the message does not arrive, open History in the app to see the execution result and the exact error. See History and troubleshooting.
Here is the delivered email, using the SMTP server and design from this guide:
Related
- Send email from Shopify Flow with Microsoft 365 - use a Microsoft 365 mailbox instead of SMTP.
- Send email from Shopify Flow with Google - use a Google mailbox instead of SMTP.
- Variables and Liquid - the full variable and Liquid reference.