

Make an HTTP request from Shopify Flow
Why use this for HTTP requests
Shopify Flow includes a built-in Send HTTP request action, but it is only available on certain Shopify plans. If your store is on Basic, you can still call external APIs by using Workflow Transactional Email instead.
You create the request once in the app, then select it inside your workflow using the HTTP Request action. Keeping the request in the app rather than in the workflow also means credentials never sit in your Flow configuration, and you get full request and response logging for free.
What you will build
A workflow that runs every 10 minutes, finds products that are not yet in Airtable, and sends them there.
This uses:
- Secrets to hold the Airtable token and base id
- HTTP Requests to define the request template
- The HTTP Request action inside Shopify Flow to run it
- History to check the result
Video guide
The whole setup: creating the secrets, the HTTP request, and the workflow. The video has no sound.
Before you start
- Workflow Transactional Email is installed.
- You have access to Shopify Flow.
- You have an Airtable base id and a table ready to receive product data.
- You have an Airtable access token with the right permissions.
Step 1: Store the credentials as secrets
Rather than typing credentials into the request, save them once as secrets and reference them as {{ secrets.yourKeyName }}. They are encrypted at rest, reusable across requests, and redacted from your history.
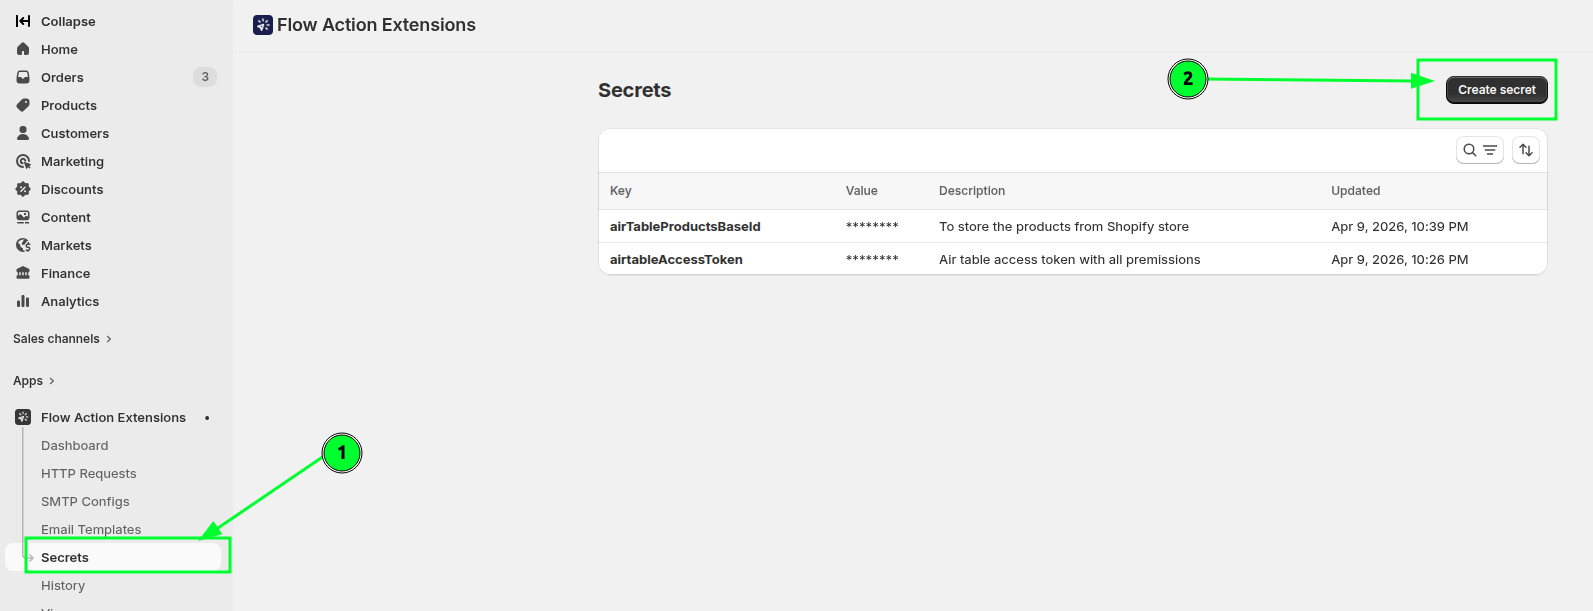
Open Secrets and click Create secret.
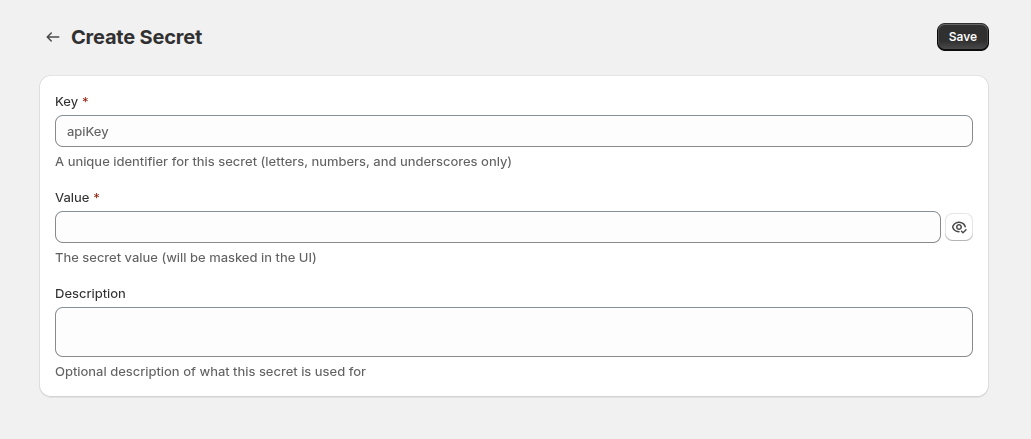
Enter the key, the value and a description, then save.
This example stores two secrets: the personal access token, and the Airtable base id.
Step 2: Create the request
This example uses Airtable's create-records endpoint.
Open HTTP Requests and click Create request.
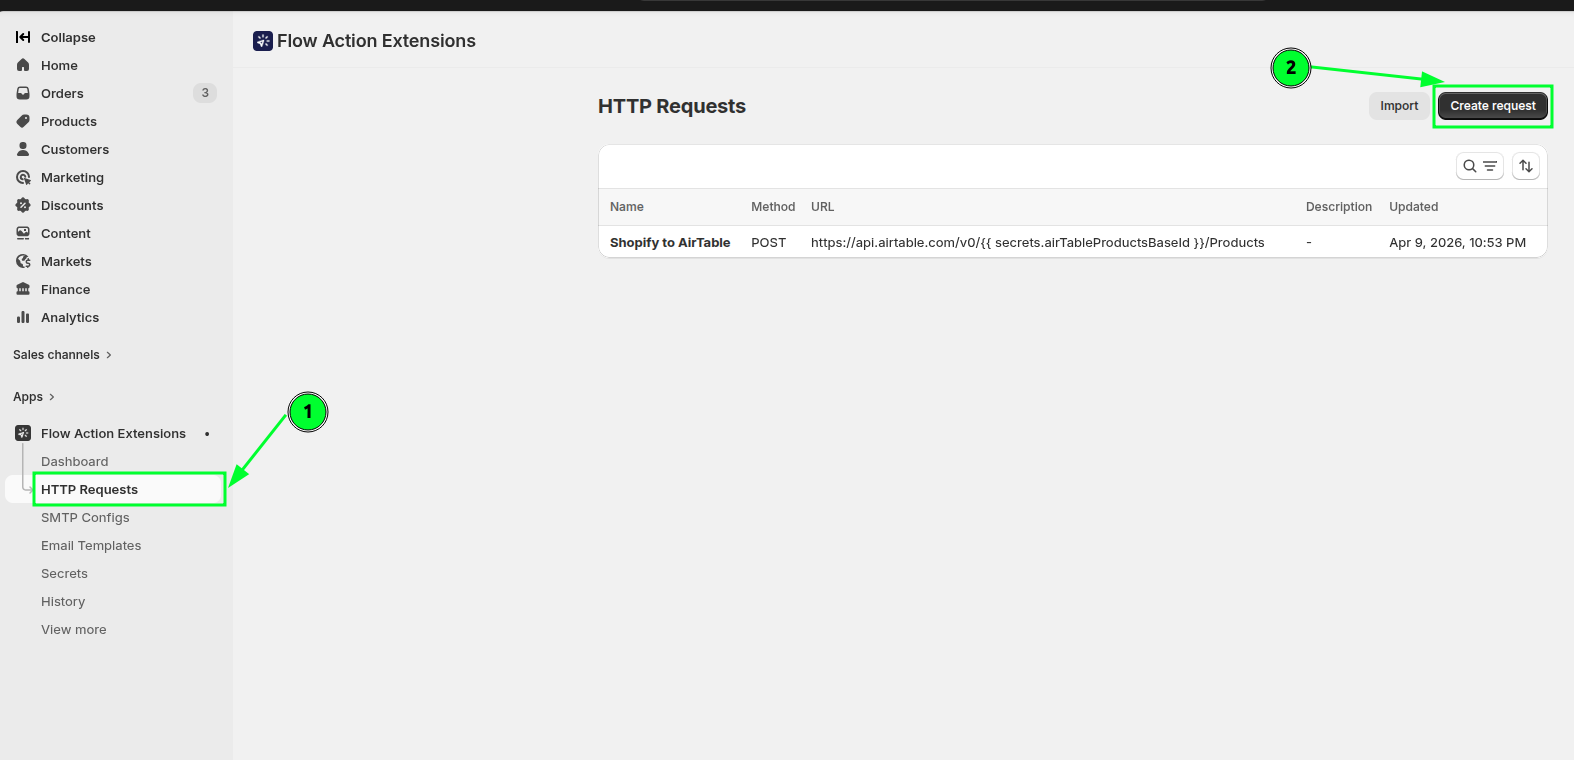
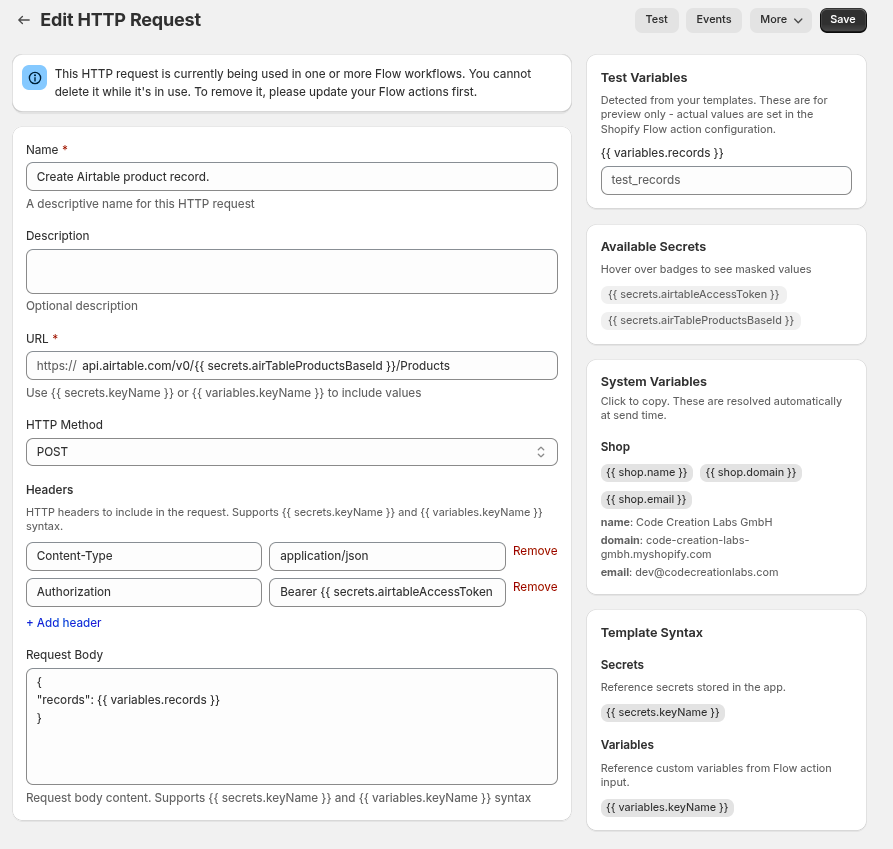
Give it a clear name such as Create Airtable product record - this is what you will look for later inside Shopify Flow.
Set the method. For creating Airtable records that is POST.
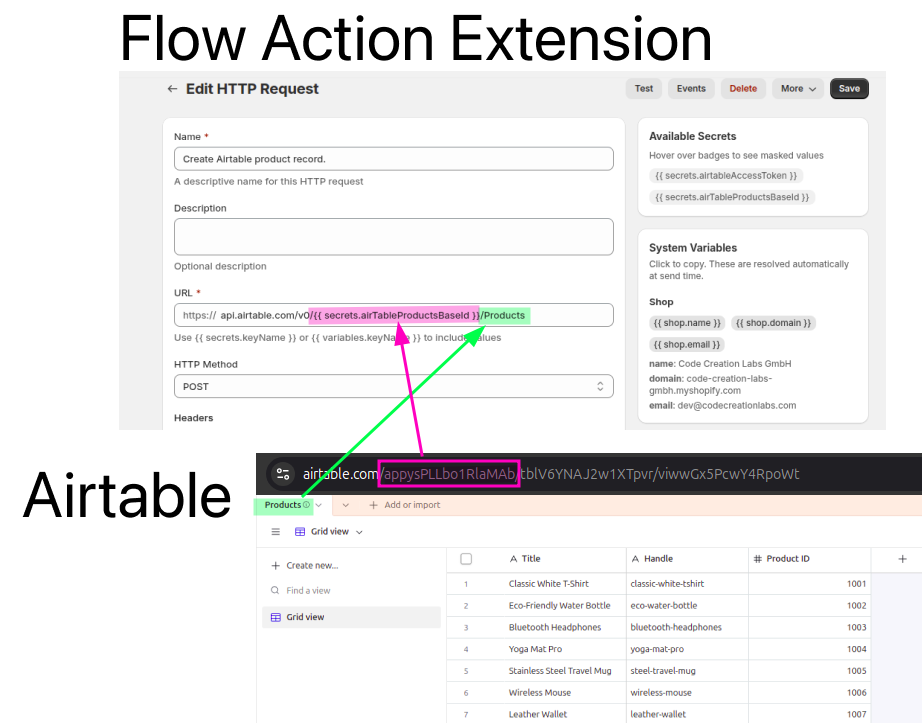
Enter the endpoint in the URL field. The https:// prefix is fixed, so type the rest:
api.airtable.com/v0/{{ secrets.airTableProductsBaseId }}/ProductsThis image shows how the Airtable endpoint maps to your base, so you can adjust it for your own:
Add the headers Airtable requires:
Authorization: Bearer {{ secrets.airtableAccessToken }}
Content-Type: application/json
In the request body, use a variable for the records so Flow can supply them:
{
  "records": {{ variables.records }}
}
Airtable expects that variable to resolve to an array shaped like this:
"records": [
  {
    "fields": {
      "Title": "Classic White T-Shirt",
      "Handle": "classic-white-tshirt",
      "Product ID": 1001
    }
  },
  {
    "fields": {
      "Title": "Eco-Friendly Water Bottle",
      "Handle": "eco-water-bottle",
      "Product ID": 1002
    }
  }
]
We will build that array in the workflow in the next step.
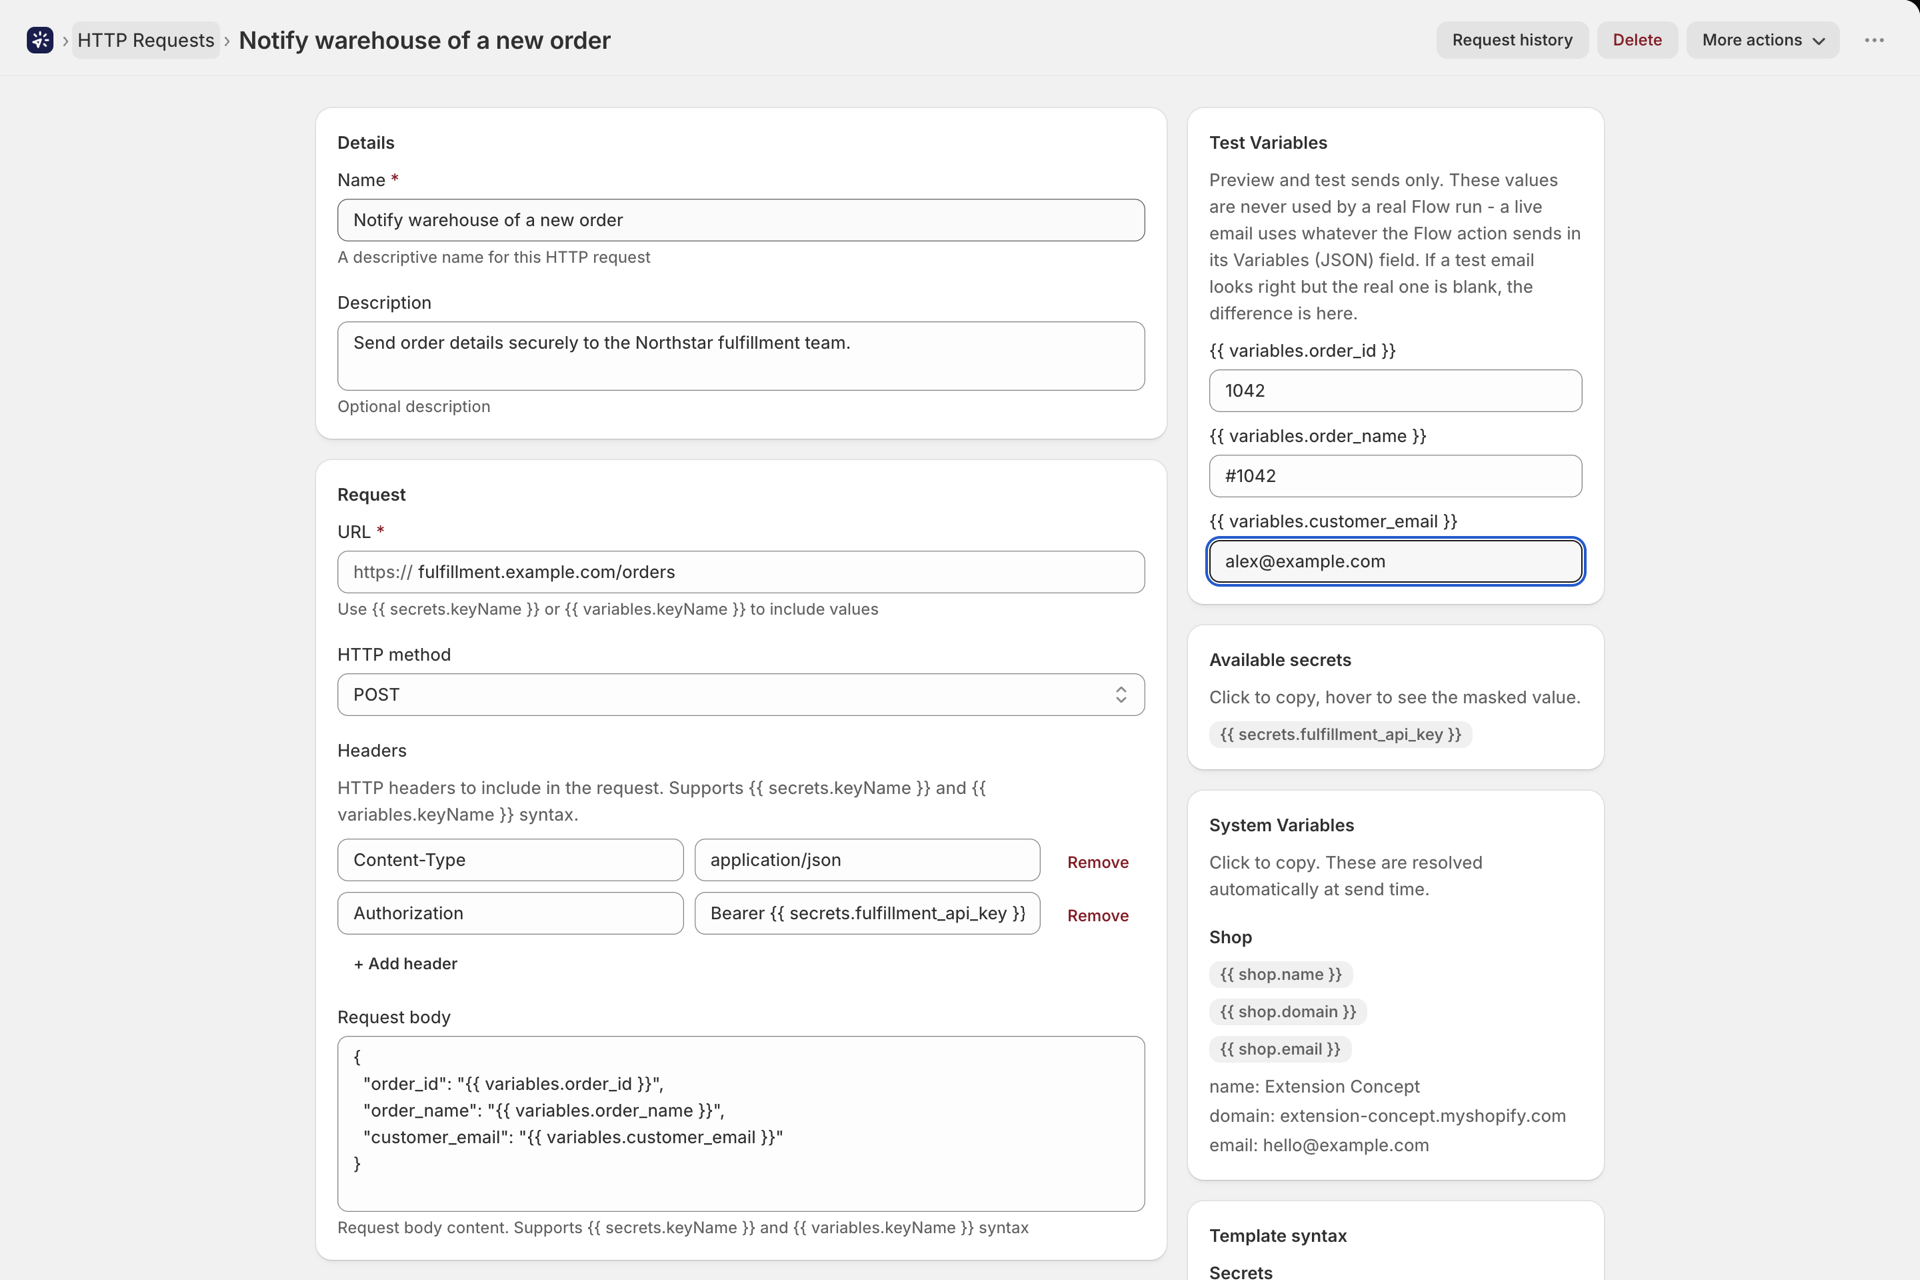
The finished request looks like this:
Save the request. It is now selectable in the HTTP Request action in Shopify Flow.
Step 3: Build the workflow
Open Shopify Flow and create a new workflow.
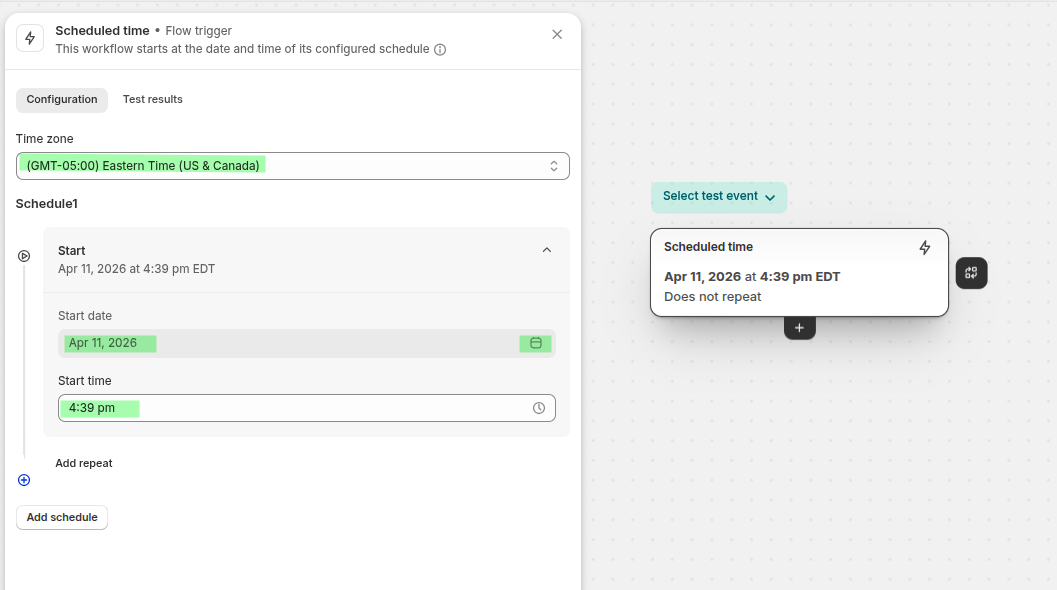
Choose a schedule-based trigger. This example runs every 10 minutes for demonstration purposes - pick something sensible for production.
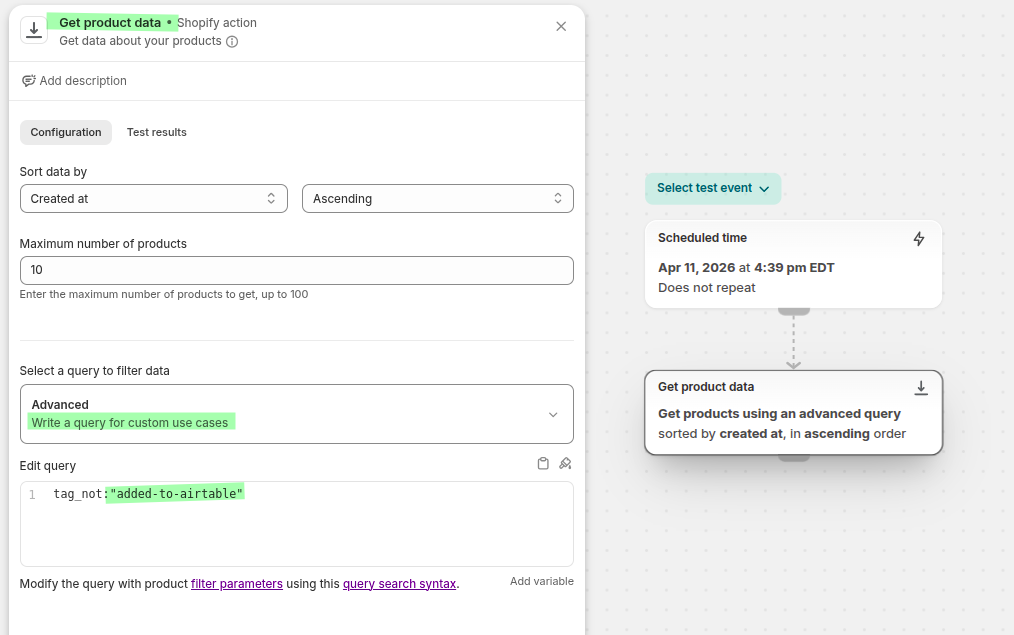
Fetch the products that are not yet in Airtable. Products already sent get the tag added-to-airtable in the final step, so this query excludes them. See Shopify's query argument reference.
Now format the data. The request body expects a records variable, so use Flow's Run code action to shape the fetched products into that array.
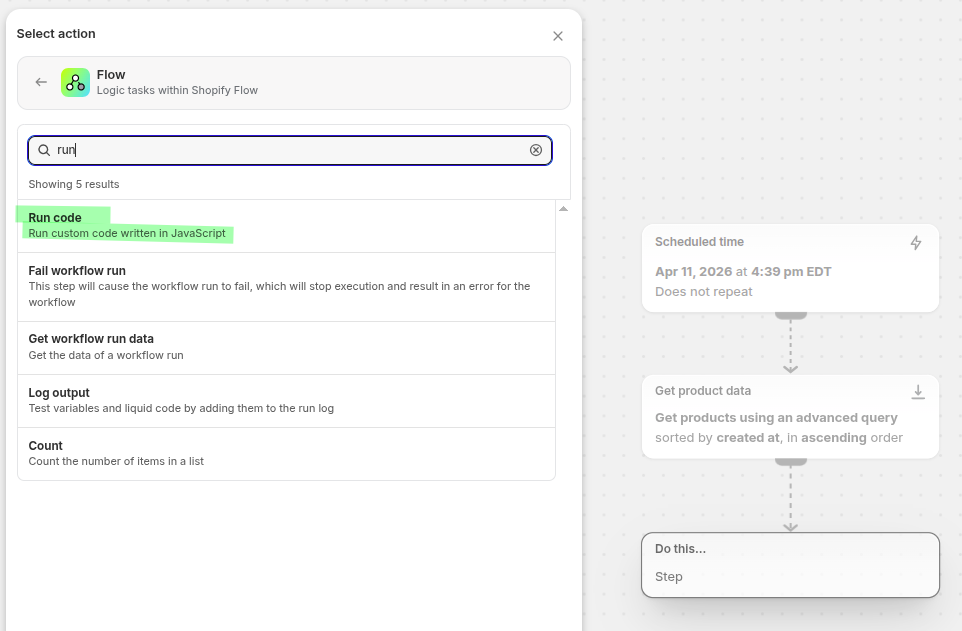
Configure the step like this:
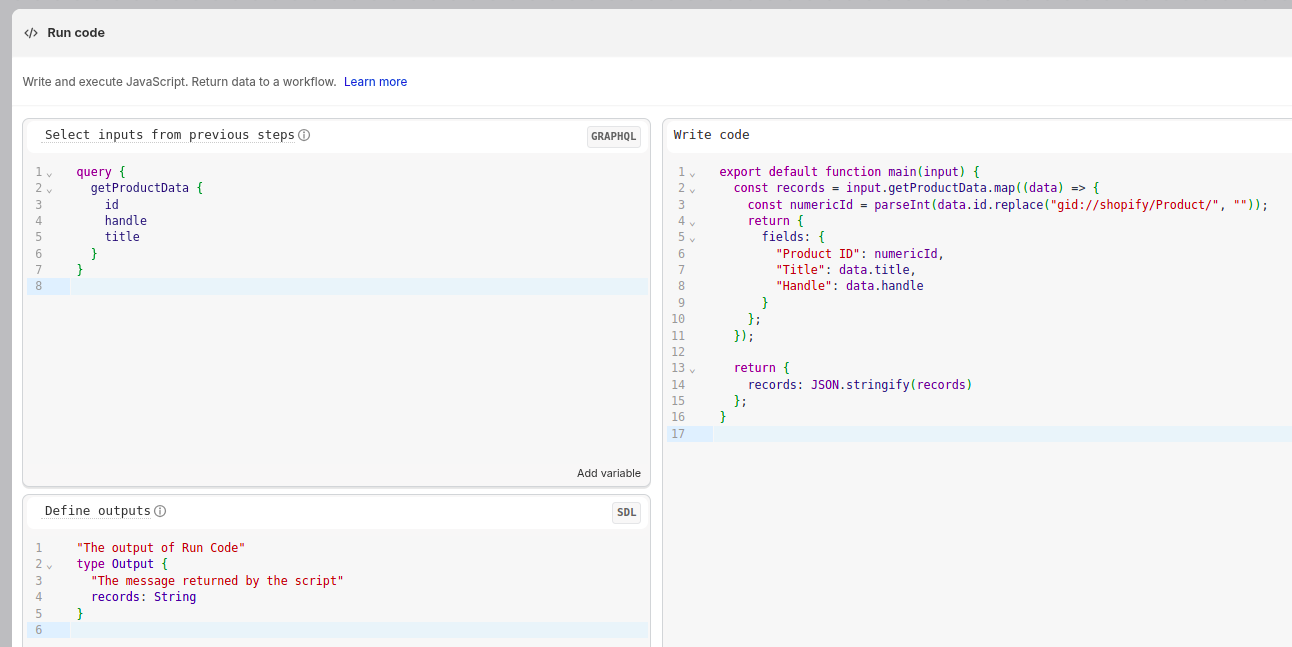
The query:
query {
  getProductData {
    id
    handle
    title
  }
}
The code:
export default function main(input) {
  const records = input.getProductData.map((data) => {
    const numericId = parseInt(data.id.replace("gid://shopify/Product/", ""));
    return {
      fields: {
        "Product ID": numericId,
        "Title": data.title,
        "Handle": data.handle
      }
    };
  });

  return {
    records: JSON.stringify(records)
  };
}
The output schema:
"The output of Run Code"
type Output {
  "The message returned by the script"
  records: String
}
You can preview the result on the right:
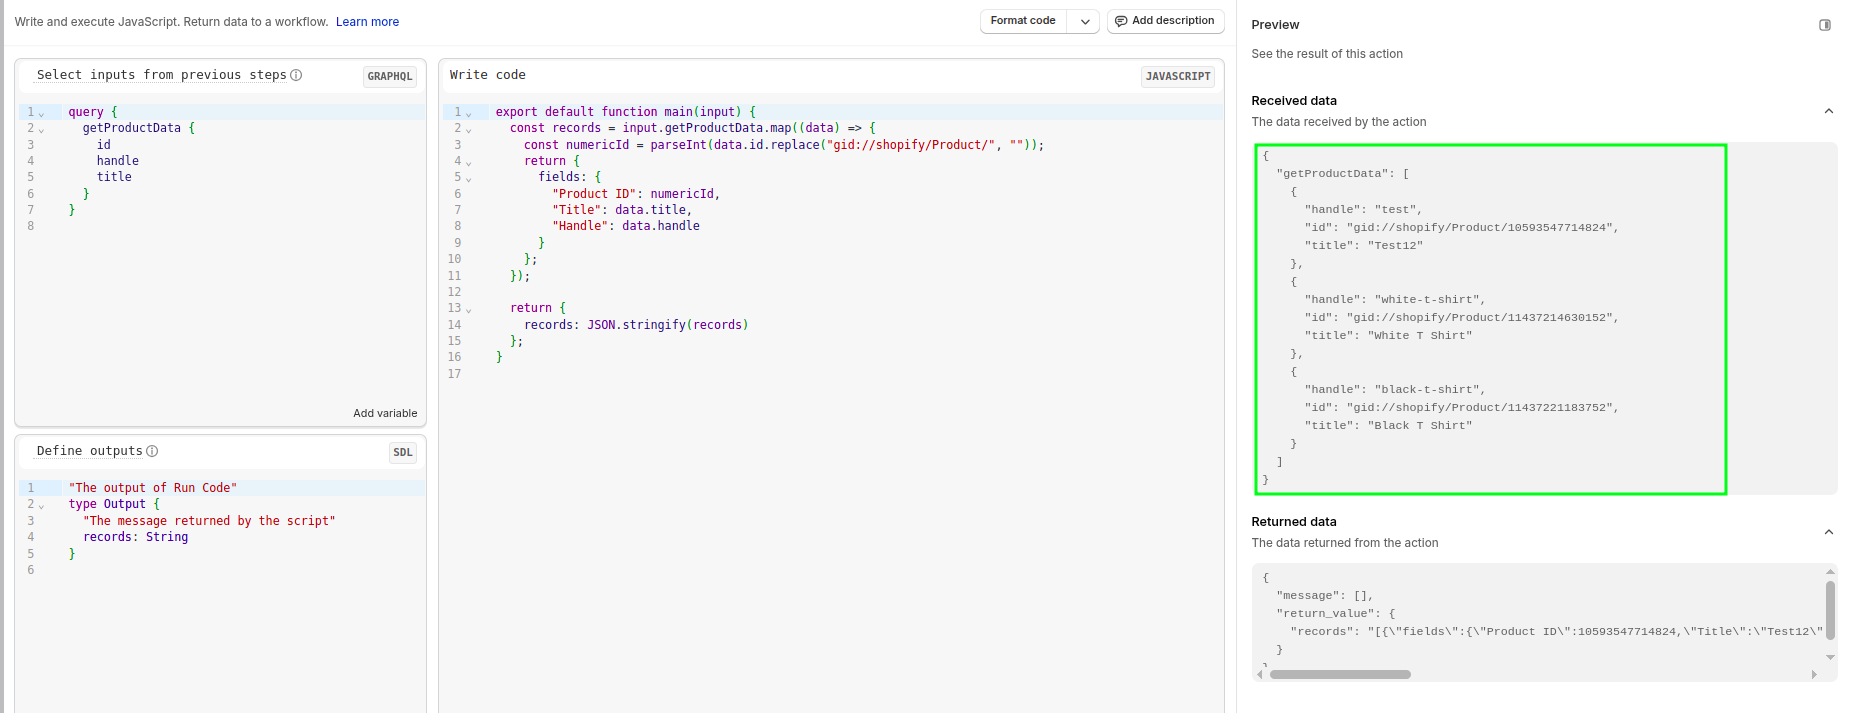
Add the HTTP Request action provided by this app.
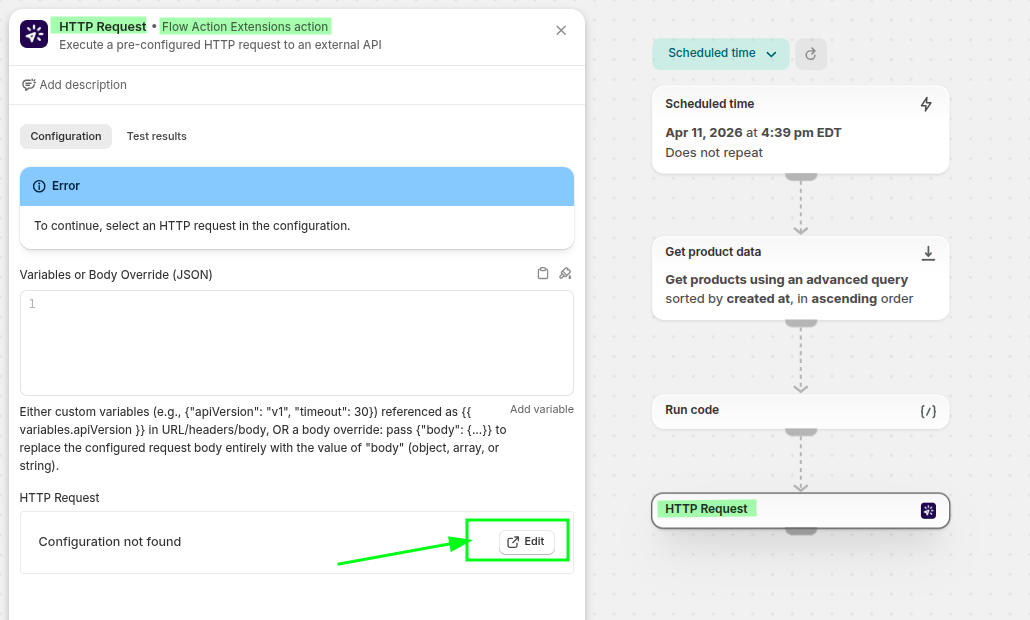
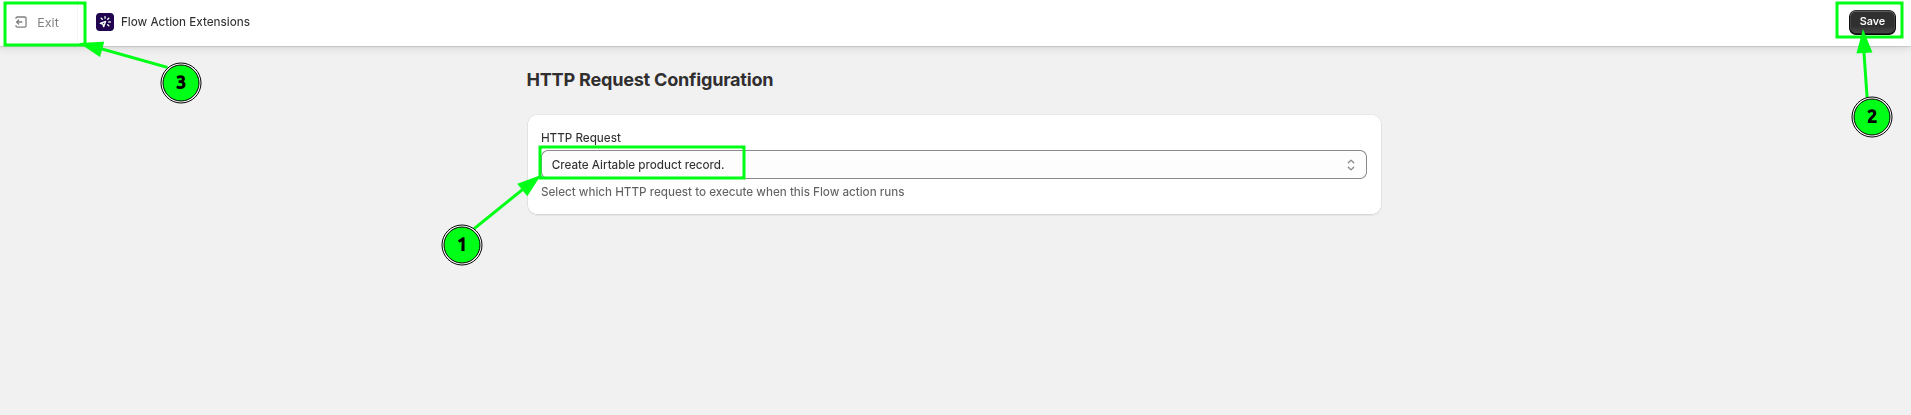
When prompted, select the request you saved - Create Airtable product record - then save and go back to the workflow.
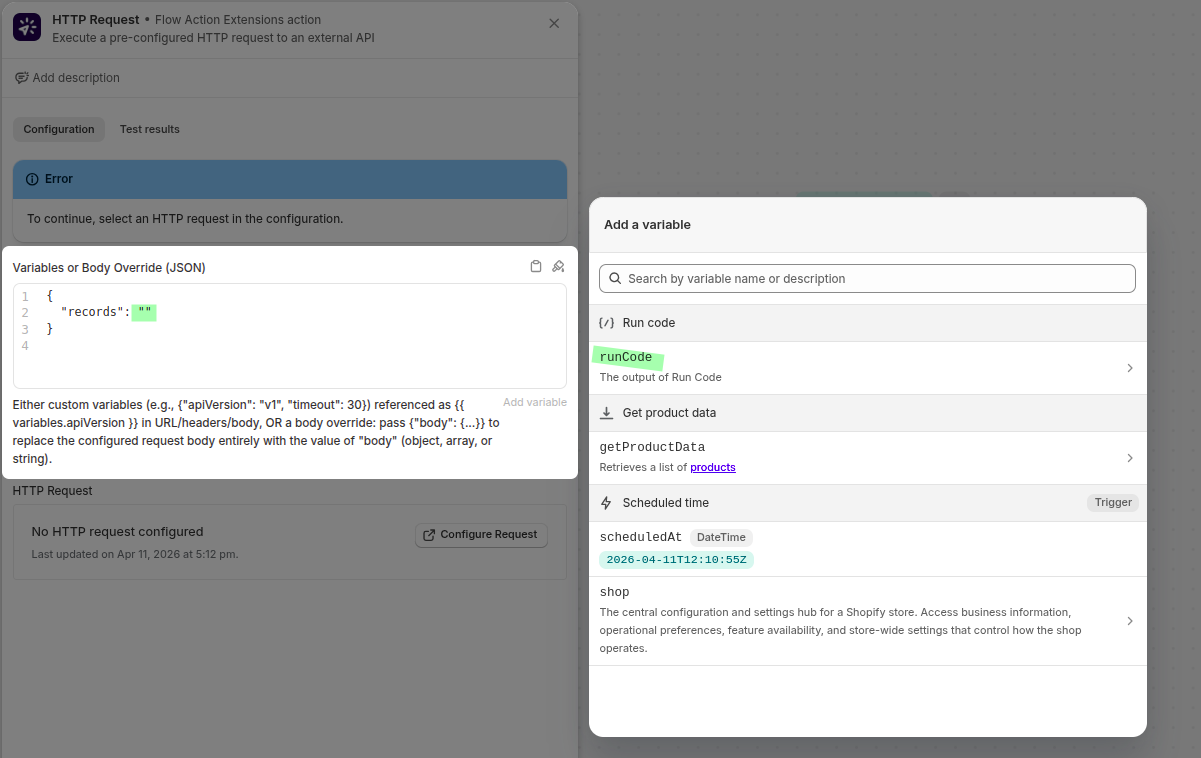
In the action's variables field, pass the records you just formatted:
{
  "records": "{{runCode.records}}"
}
Finally, iterate over the fetched products and tag them added-to-airtable, so the next run does not pick them up again.
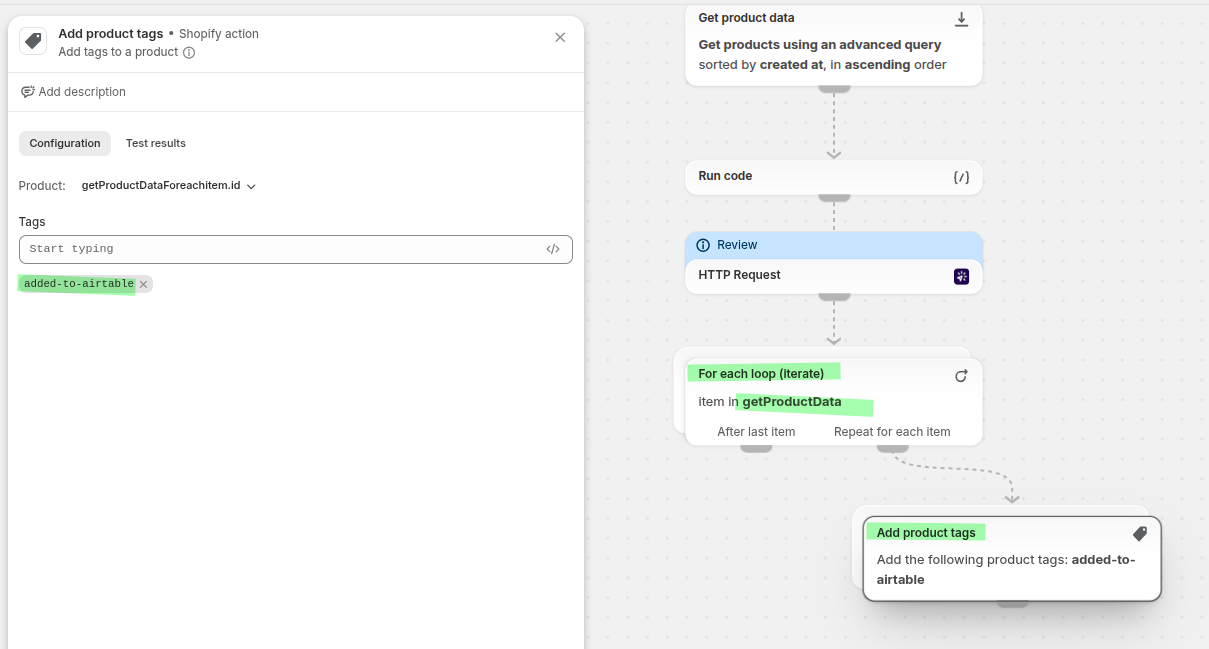
Save and turn on the workflow.
Step 4: Confirm it worked
In History you can see whether the request succeeded and what Airtable sent back.
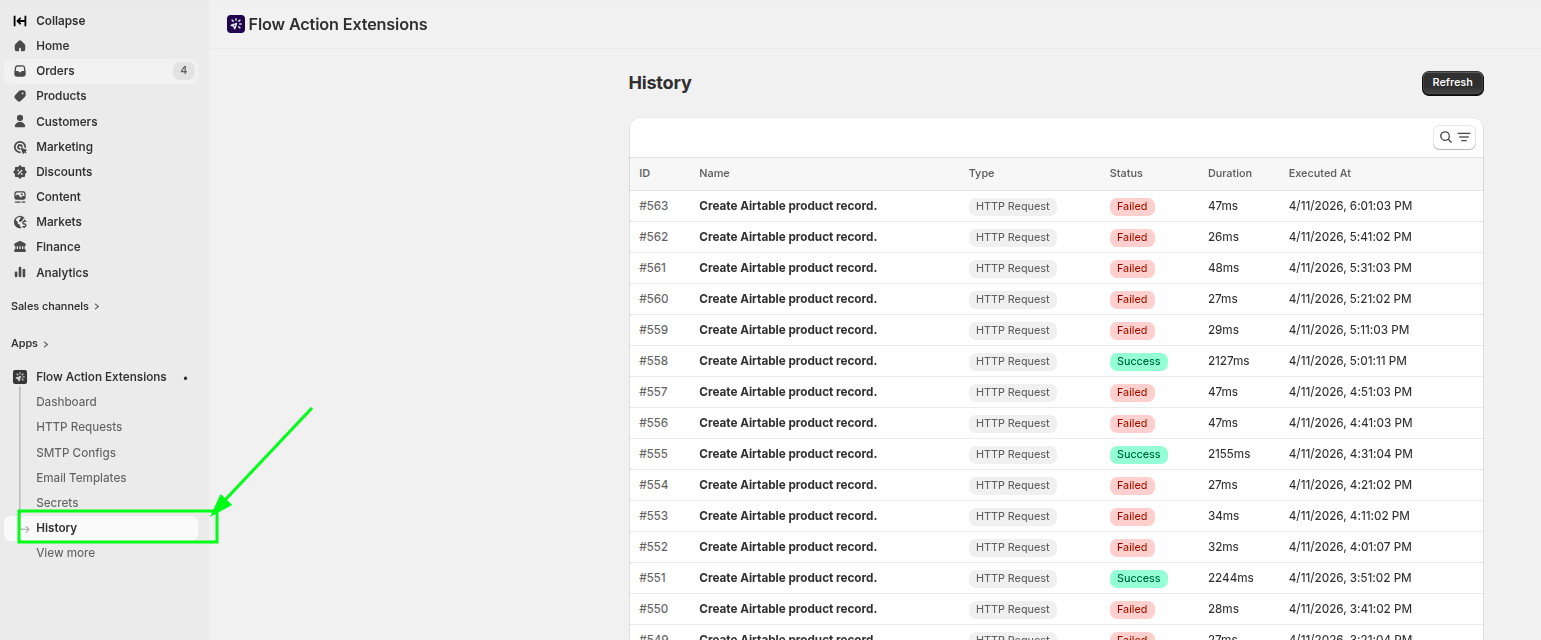
Open the entry to inspect the request data, the response data and the timing.
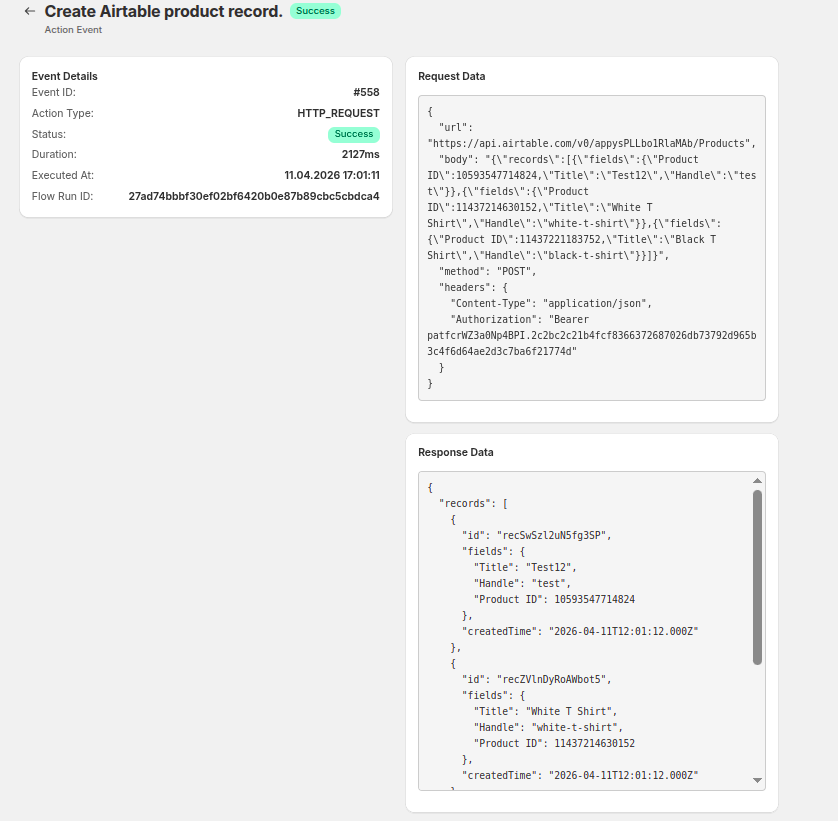
From the request's edit page, the Request history button jumps straight to History filtered to that one request.
What the app will not let you call
Merchant-configured requests go through a safety guard. Requests to internal or private network addresses are refused, including localhost, cloud metadata endpoints, and anything resolving to a private range - even via a redirect. If you see an error mentioning SSRF blocked, the destination is on that list. Requests also follow at most 5 redirects and cap the response at 10 MB.
Shopify Flow itself caps an action response at 50 KB. If a test response is larger, the app blocks saving rather than letting the step fail inside a live workflow.
Best practices
- Use clear request names so they are easy to find in Shopify Flow.
- Store API tokens as secrets rather than typing them into headers.
- Keep the body focused on the fields the destination actually needs.
- Check History after any change, to confirm the request still succeeds.
- Add a condition before the request so it does not run on empty cycles.
Related
- Secrets - storing credentials.
- Variables and Liquid - the variable reference, including body override.
- History and troubleshooting - reading a failed request.