

Send email from Shopify Flow with Microsoft 365
Overview
Workflow Transactional Email can send through a connected Microsoft 365 mailbox instead of an SMTP server. There are no SMTP credentials to manage - you authorize the mailbox once, and the app sends through Microsoft Graph on your behalf.
You will configure this in two places: the app, for the sender connection, and Shopify Flow, for the automation.
Before you start
- You need Workflow Transactional Email installed in your Shopify store.
- You need a Microsoft 365 or Outlook mailbox you can authorize.
- You should already have an email layout saved, because the Send Transactional Email action sends a saved layout. See Build an email layout.
Video guide
The video has no sound, so adjust the playback speed to suit you.
Connect your Microsoft 365 account
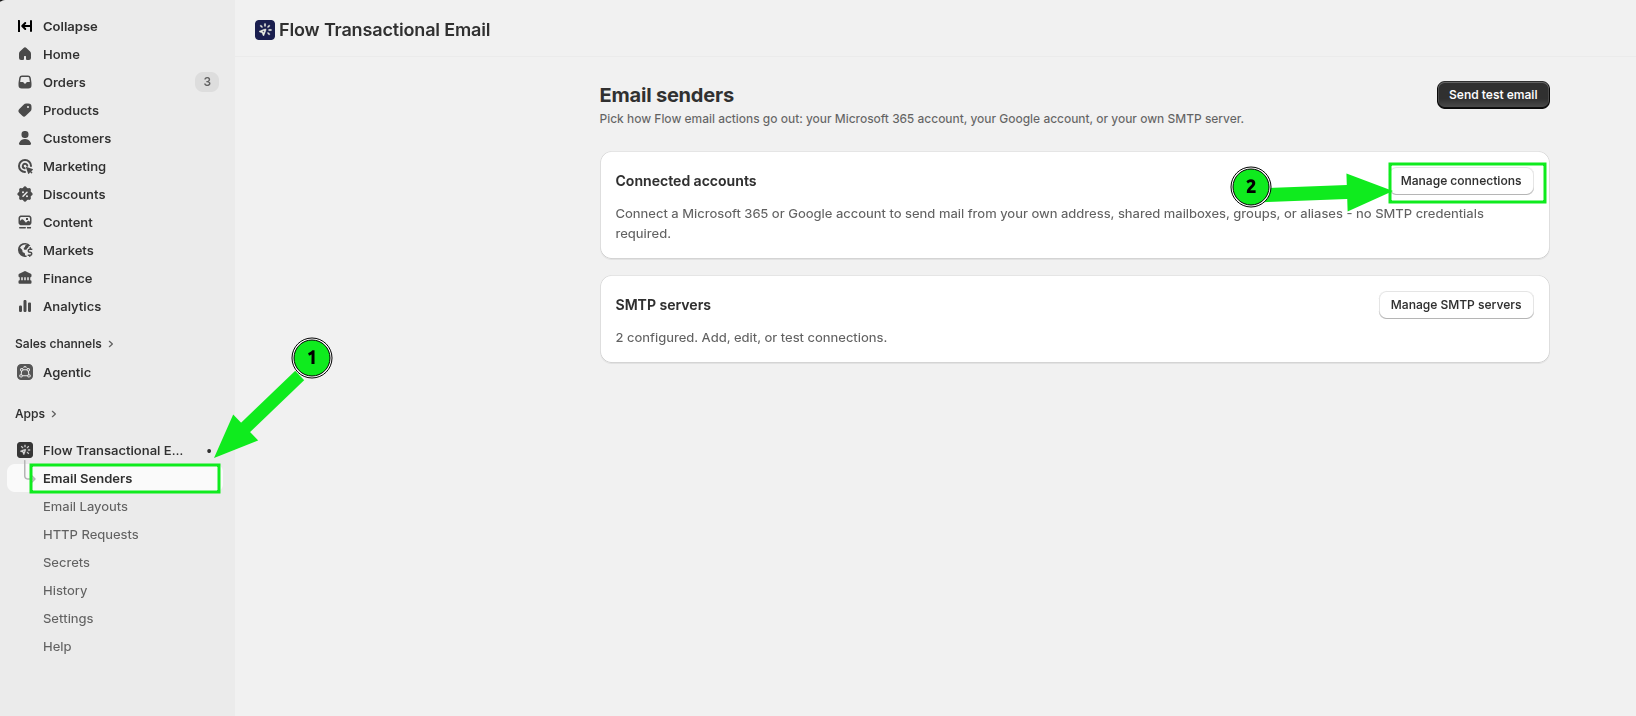
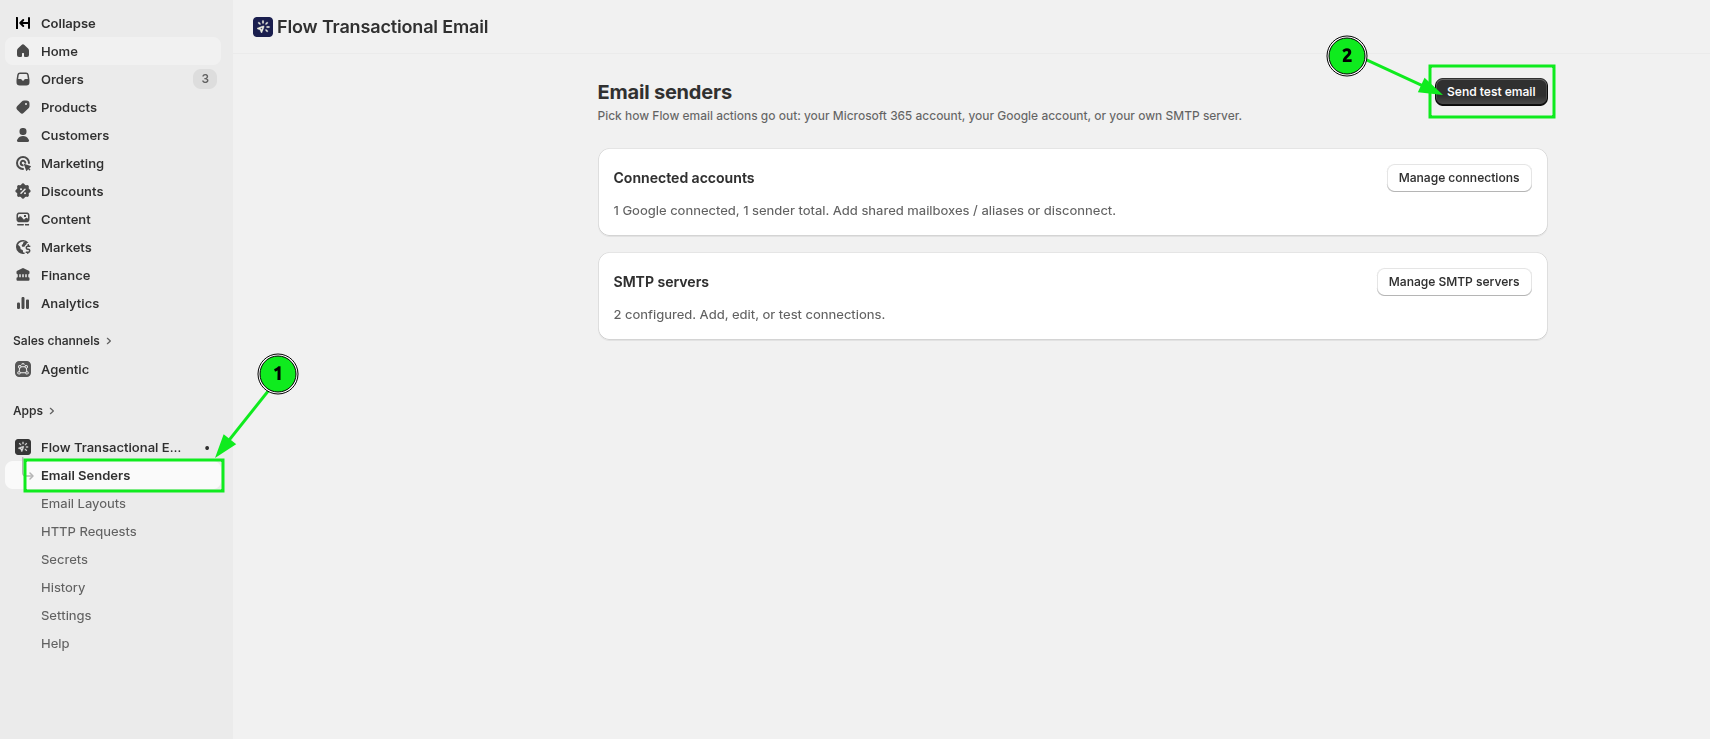
In the Shopify admin, open Apps and select Workflow Transactional Email, then click Email Senders. In the Connected accounts section, click Manage connections.
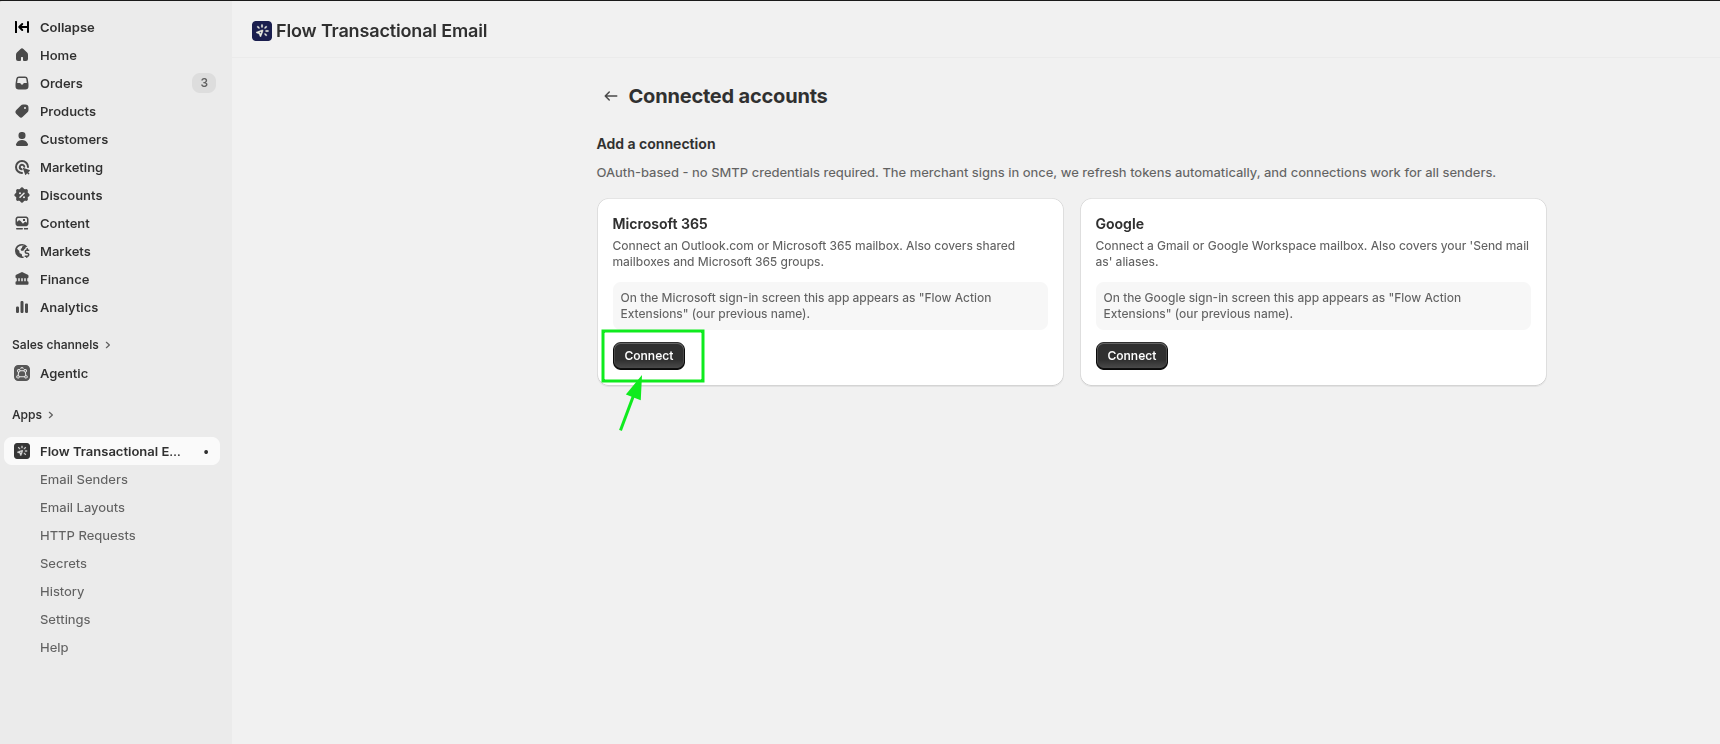
On the Connected accounts page, find Microsoft 365 and click Connect.
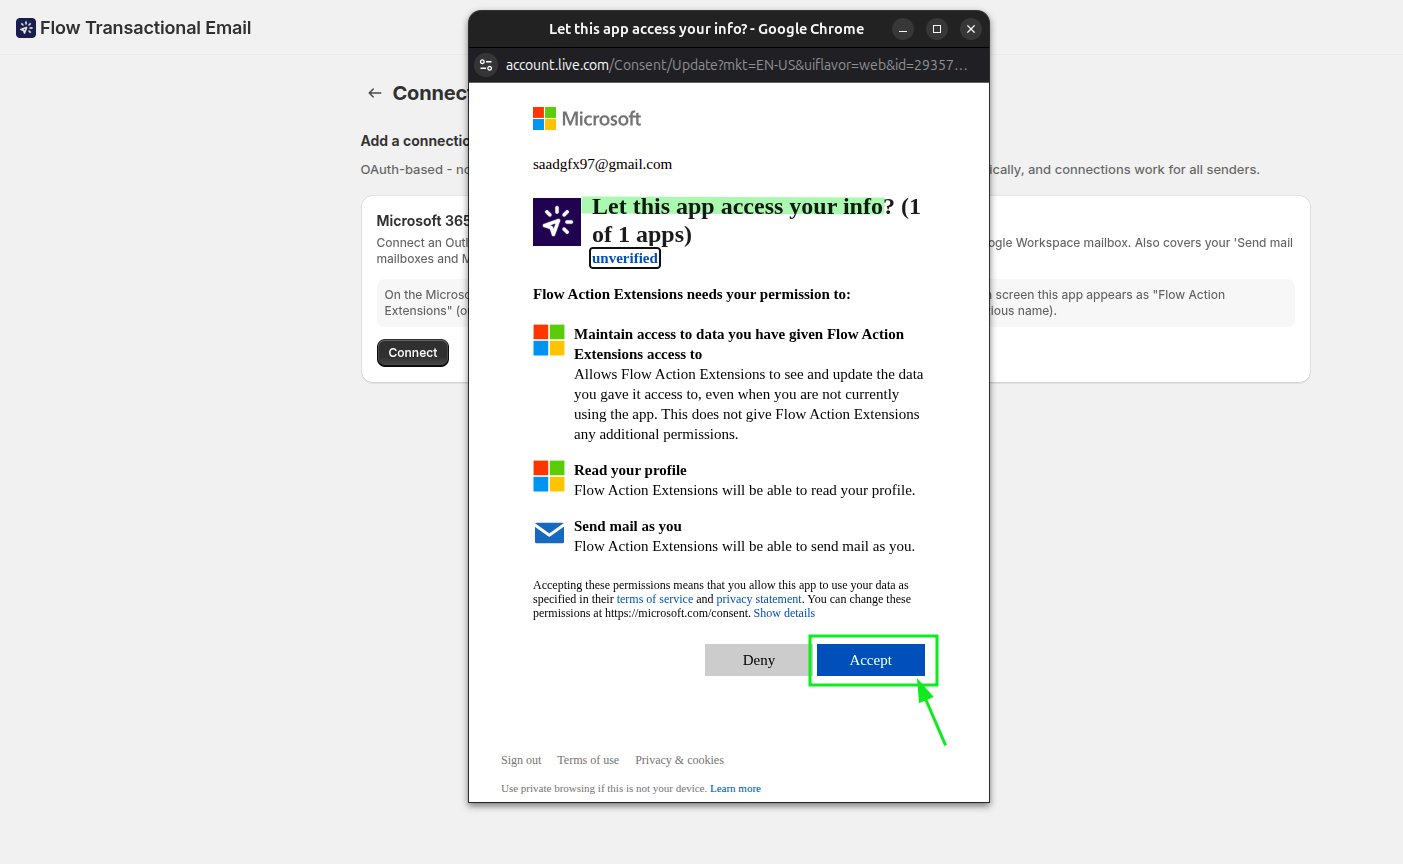
A Microsoft authorization window opens. Sign in to the mailbox you want to use and grant access.
After authorizing you return to Connected accounts. The Microsoft 365 connection shows a Connected status and the mailbox appears under Senders.
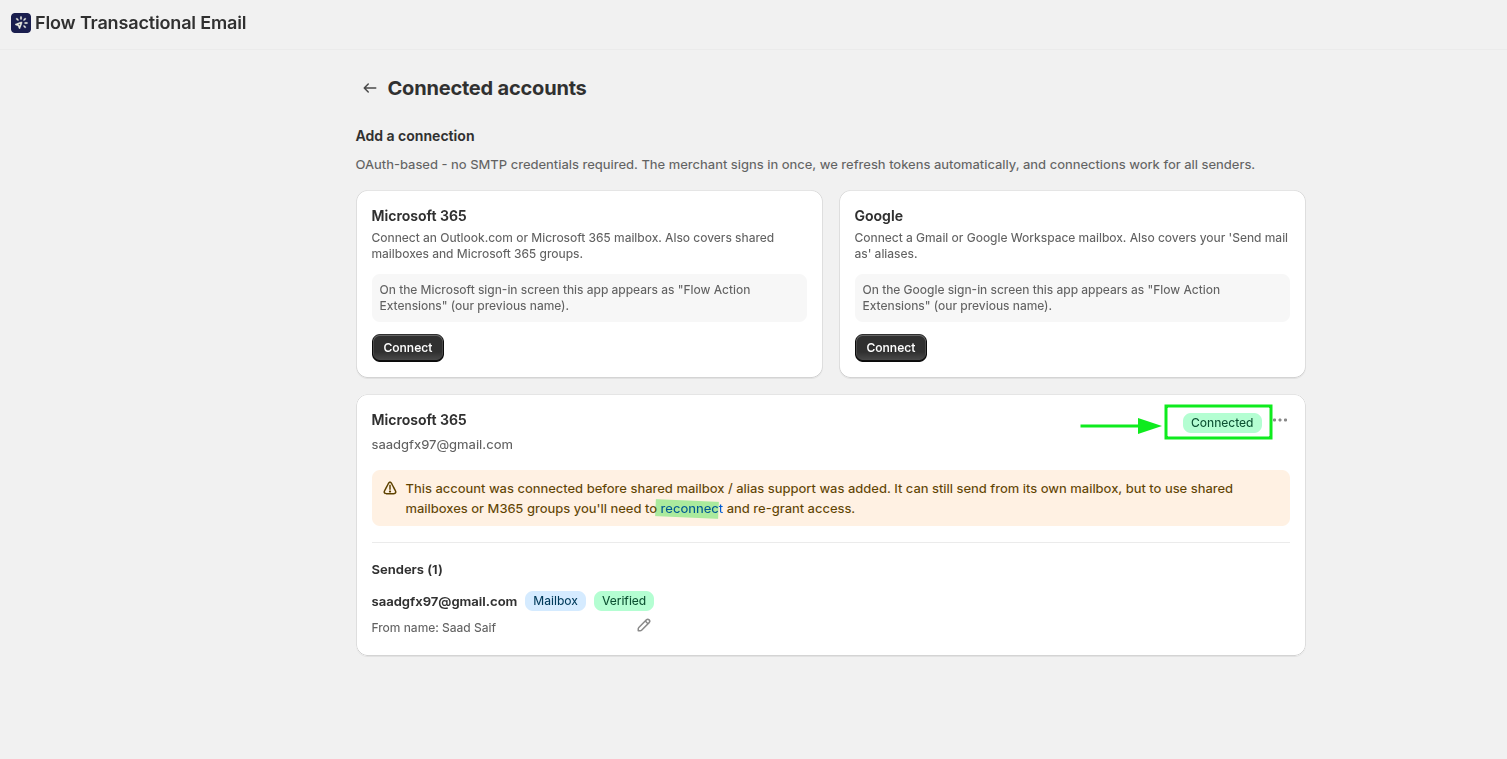
If you later need to widen the permissions, use Reconnect on the same card rather than removing and re-adding the account.
Send a test email
Before wiring it into a workflow, send a test message to confirm the mailbox works. Go back to Email Senders and click Send test email.
In the dialog, select your connected Microsoft 365 sender in the Sender field, enter a destination in Recipient email, then click Send.
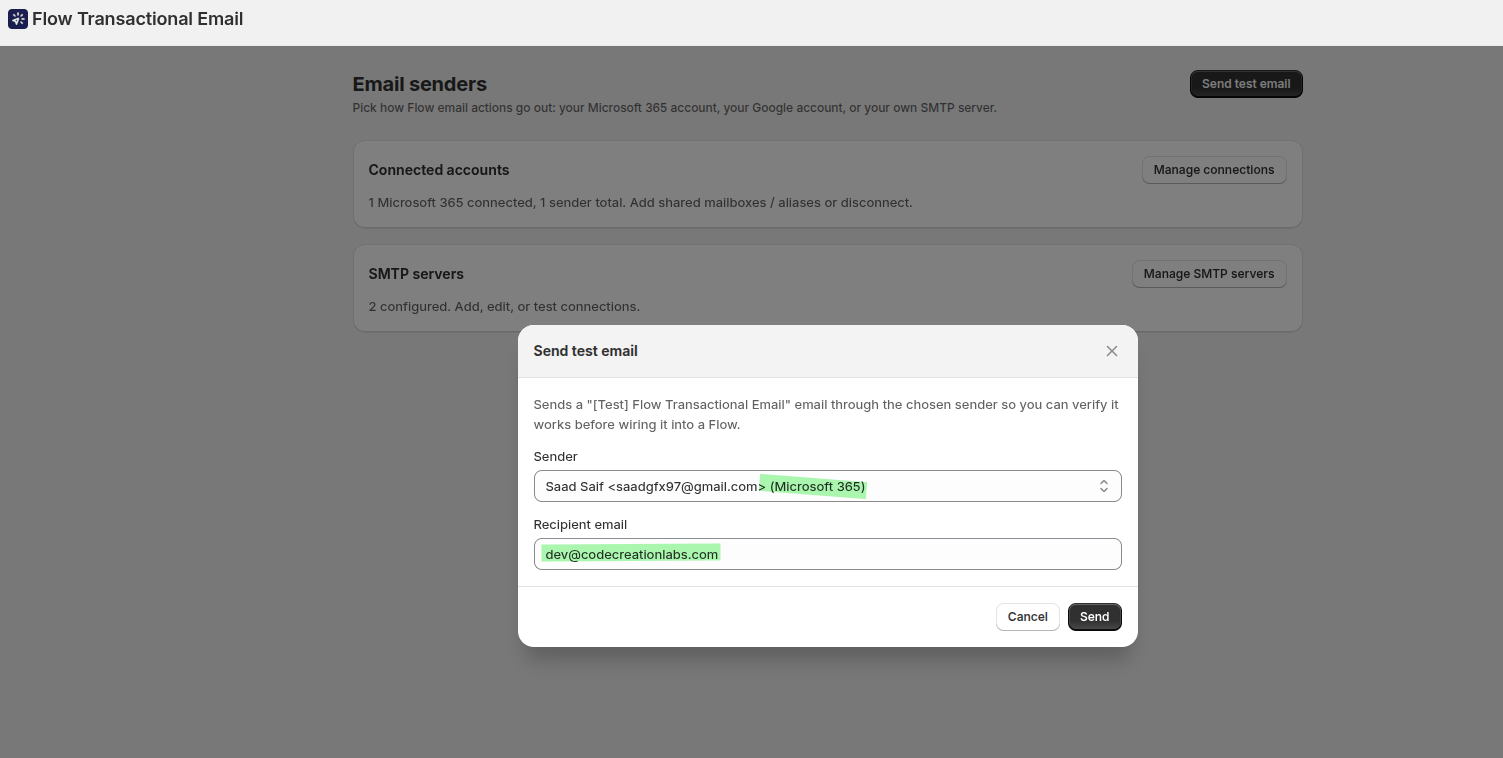
Check the recipient's inbox. If the message arrives, the connection is ready to use. This is the fastest way to confirm the mailbox, the permissions and the sender configuration are all correct before you build anything in Flow.
Use the sender in Shopify Flow
In Shopify Flow, create a workflow and choose the trigger Customer Tags Added. To send only for specific tags, add a condition such as Added tags is at least one of vip.
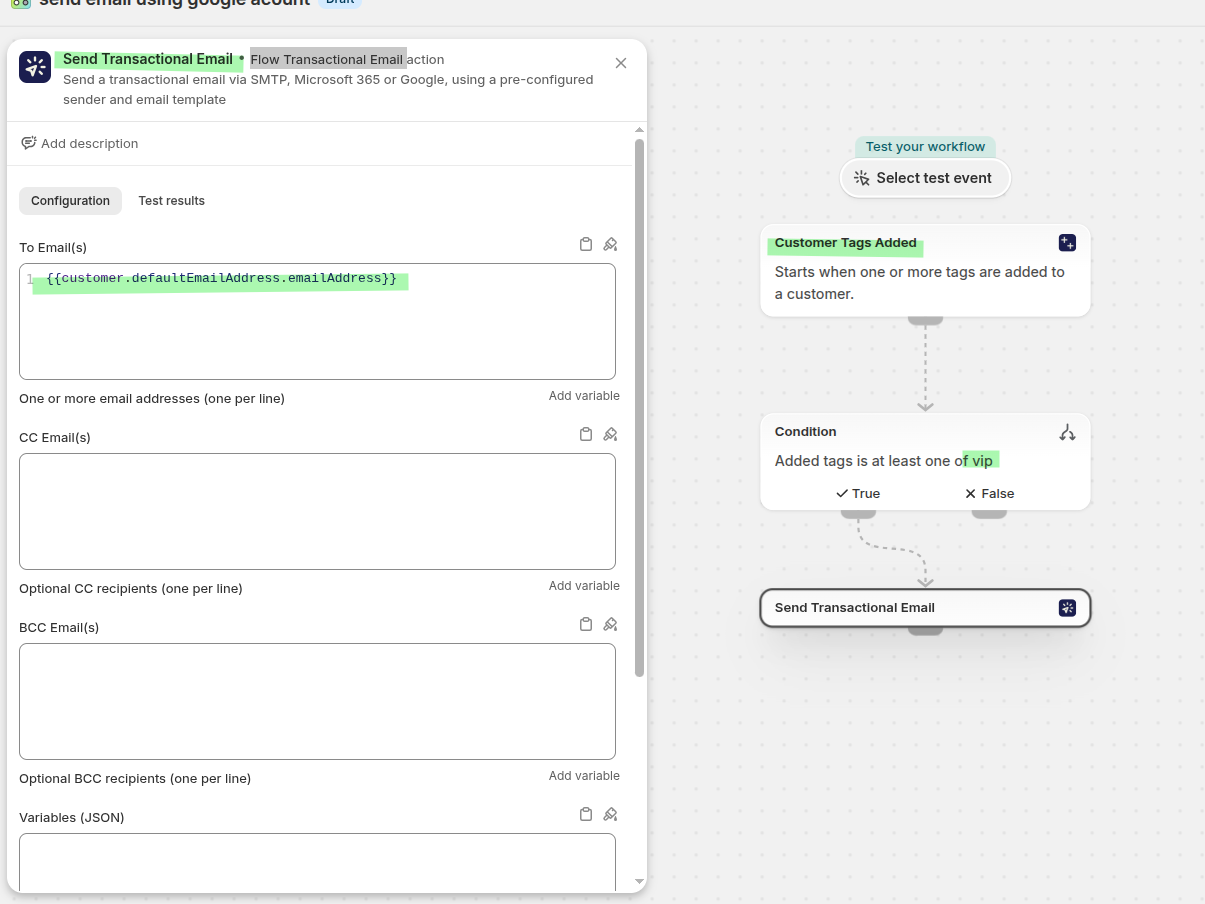
Add the Send Transactional Email action. Set To Email(s) to the customer's email variable, so the message goes to the customer who triggered the workflow:
{{customer.defaultEmailAddress.emailAddress}}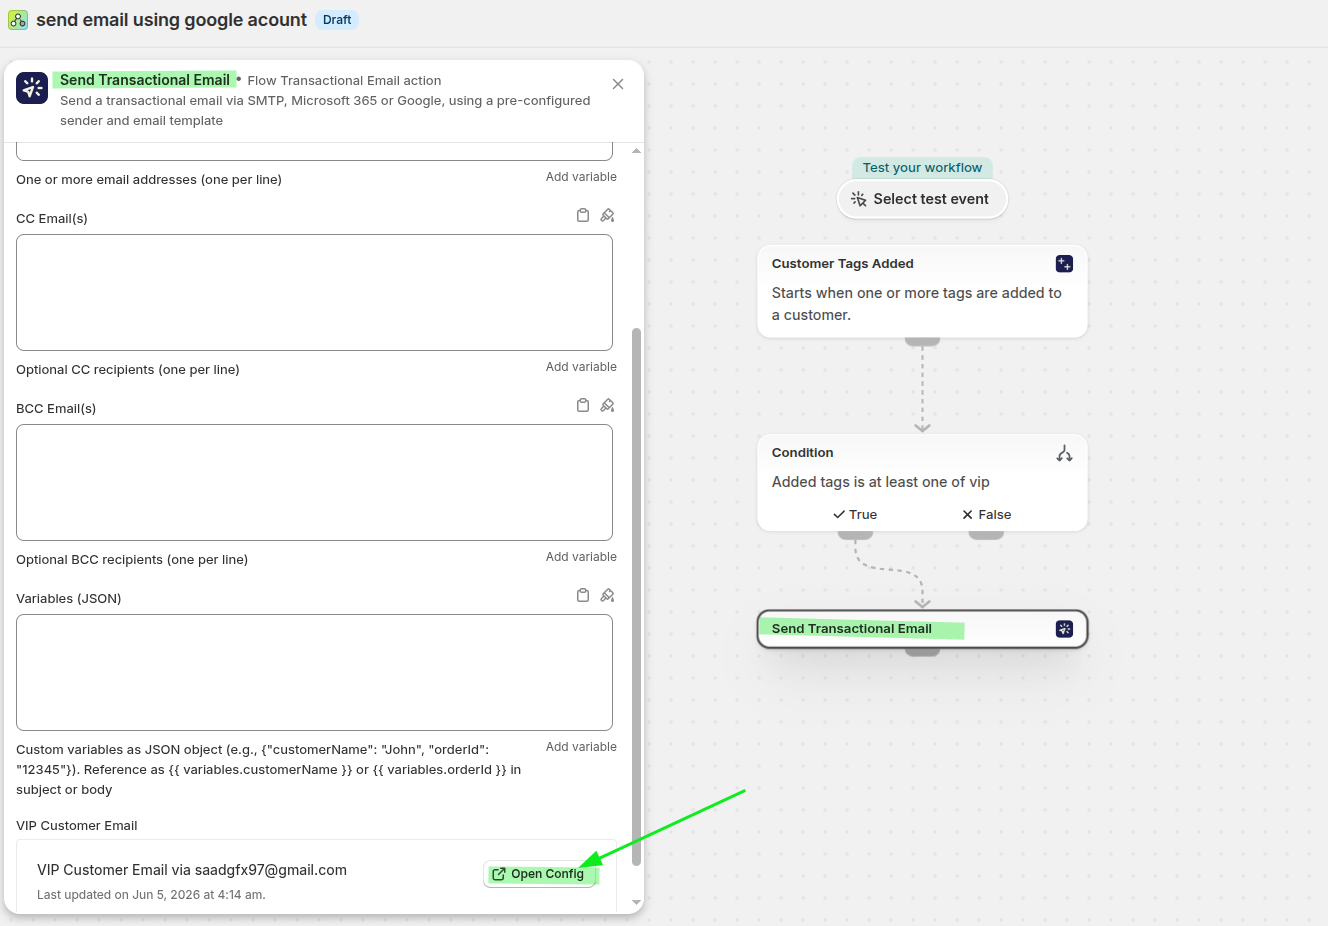
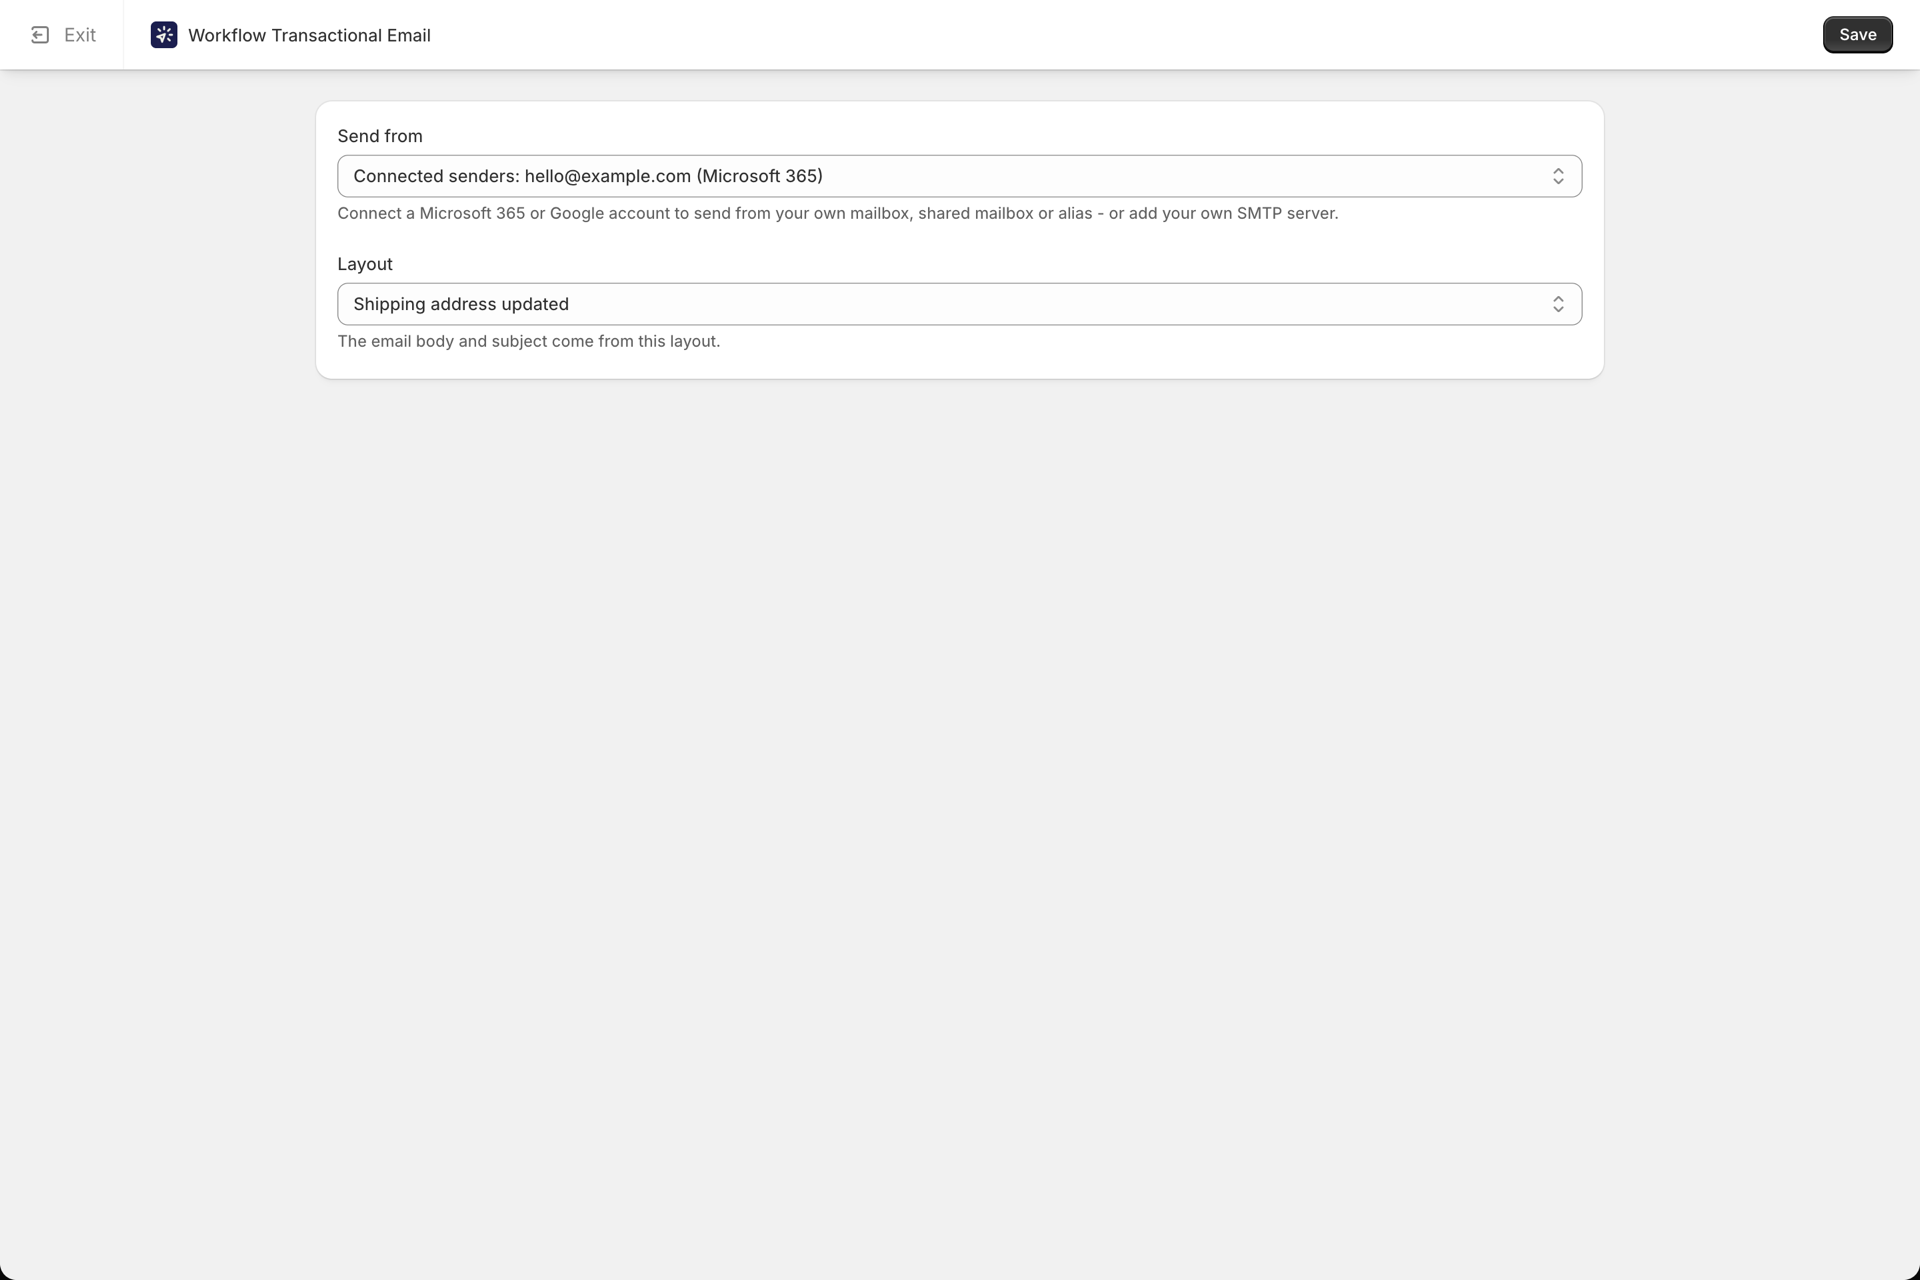
Scroll to the template section in the action and click Open Config. This opens the configuration screen where you pick the sender and the layout.
Select your connected Microsoft 365 account in Send from, choose the layout in Template, click Save, then Exit.
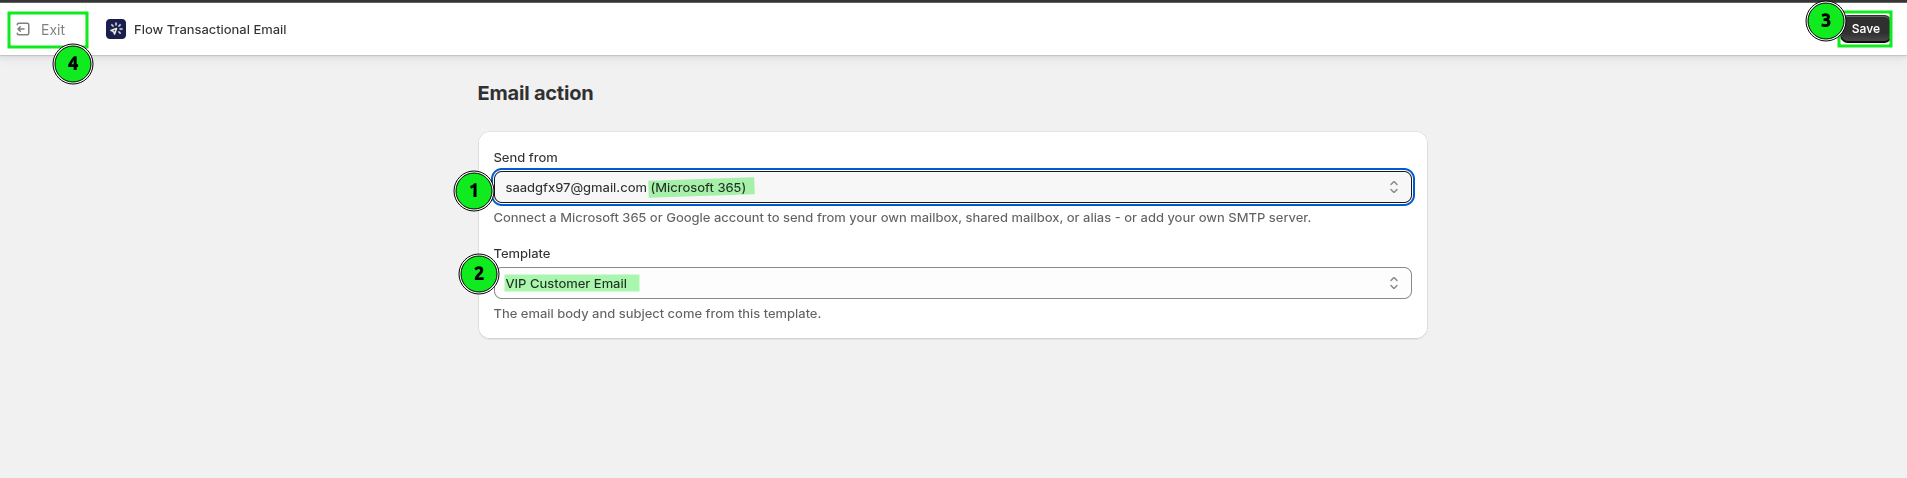
Save the workflow and turn it on. Add the tag to a customer, and the message goes out through your connected Microsoft 365 mailbox.
What this workflow does
Shopify Flow watches for customer tag changes, then passes the customer data into Send Transactional Email. That action renders your selected layout and sends it through the Microsoft 365 sender you chose in Send from.
The content of the outgoing message comes entirely from the layout selected in Template. To change what the email says, edit the layout - not the workflow.
Troubleshooting
The sender is missing from the Send from dropdown. Reopen the action, click Open Config, and check the sender is listed. If it is not, refresh the Flow editor and reopen the action.
The email is not arriving. Send a message from Email Senders using Send test email first, and confirm the correct Sender and Recipient email were used. If the account was connected a while ago and needs new permissions, use Reconnect on Connected accounts.
The workflow is not running at all. Check the workflow is turned on, the trigger is Customer Tags Added, and the condition matches the tag you actually applied - tag matching is exact.
For the failure detail on a specific send, open History. See History and troubleshooting.
Related
- Send email from Shopify Flow with Google - the same setup with a Google mailbox.
- Send email from Shopify Flow with a custom SMTP server - use your own mail server instead.
- Build an email layout - design the email being sent.